Showing posts with label Setup Guide. Show all posts

Wednesday, 29 August 2018

Legacy Windows XP for Industrial Machine Access and Management and Accounting Apps

There are quite a few systems out there that still use Windows XP or an earlier operating system to run the equipment.

So, what do we do when we need to get access to one of these kinds of machines?

Well for one, we make sure they are completely isolated and not accessible from anywhere except perhaps one secure jump point.

For another, when we do need to access the legacy system here's one method that allows for maintaining the legacy system's isolation:

  1. Enable RDP Inbound on the legacy system (Windows)
  2. Set up a vanilla Windows 7 Service Pack 1 VM that is set to not update
    • This would be our jump point
    • The Win7 VM would be left off except when needed
    • If need be, set this VM up on a laptop that can be plugged in to the legacy system's network
  3. Set up any needed tools on the Win7 VM
    • RMM, Remote Desktop Shadow/Sharing tools, Firefox (leave the base level IE in place), any needed tools
  4. Log on to the legacy Windows XP via RDP
    • Make sure Drive Redirection is enabled
    • Use Drive Redirection to transfer any files that won't go via Copy & Paste (Clipboard)
  5. Use the Win7 VM as the default work-from desktop
  6. When done, shut the Win7VM down
    • Unplug from the legacy network when done if using a laptop with the Win7VM

For legacy systems require some form of *NIX the above process can be used for a vanilla install of the needed distro and kept offline until needed.

The principle at work here is to keep the legacy systems isolated from everywhere especially the Internet. And, to keep any jump points running an intermediary operating system that is too far back to keep safe and secure offline until needed.

As an FYI, we keep one or two legacy Windows 7 and Windows XP VMs in an offline state with legacy accounting applications installed as a just-in-case. There are times where a firm may need to go way back for a client file.

Philip Elder
Microsoft High Availability MVP
MPECS Inc.
Co-Author: SBS 2008 Blueprint Book
www.commodityclusters.com
Our Web Site
Our Cloud Service

Friday, 10 August 2018

Intel/LSI/Avago StorCli Error: syntax error, unexpected $end FIX

We're working with an Intel setup and needed to verify the setup on an Intel RAID Controller.

After downloading the command line utilities, since we're in Server Core, we hit this:

C:\Temp\Windows>storcli /cx show

syntax error, unexpected $end

     Storage Command Line Tool  Ver 007.0415.0000.0000 Feb 13, 2018

     (c)Copyright 2018, AVAGO Technologies, All Rights Reserved.


help - lists all the commands with their usage. E.g. storcli help
<command> help - gives details about a particular command. E.g. storcli add help

List of commands:

Commands   Description
-------------------------------------------------------------------
add        Adds/creates a new element to controller like VD,Spare..etc
delete     Deletes an element like VD,Spare
show       Displays information about an element
set        Set a particular value to a property
get        Get a particular value to a property
compare    Compares particular value to a property
start      Start background operation
stop       Stop background operation
pause      Pause background operation
resume     Resume background operation
download   Downloads file to given device
expand     expands size of given drive
insert     inserts new drive for missing
transform  downgrades the controller
/cx        Controller specific commands
/ex        Enclosure specific commands
/sx        Slot/PD specific commands
/vx        Virtual drive specific commands
/dx        Disk group specific commands
/fall      Foreign configuration specific commands
/px        Phy specific commands
/[bbu|cv]  Battery Backup Unit, Cachevault commands
/jbodx      JBOD drive specific commands

Other aliases : cachecade, freespace, sysinfo

Use a combination of commands to filter the output of help further.
E.g. 'storcli cx show help' displays all the show operations on cx.
Use verbose for detailed description E.g. 'storcli add  verbose help'
Use 'page=[x]' as the last option in all the commands to set the page break.
X=lines per page. E.g. 'storcli help page=10'
Use J as the last option to print the command output in JSON format
Command options must be entered in the same order as displayed in the help of
the respective commands.

What the Help does not make clear, and what our stumbling block was, is what exactly we're missing.

It turns out, that the correct command is:

C:\Temp\Windows>storcli /c0 show jbod
CLI Version = 007.0415.0000.0000 Feb 13, 2018
Operating system = Windows Server 2016
Controller = 0
Status = Success
Description = None


Controller Properties :
=====================

----------------
Ctrl_Prop Value
----------------
JBOD      ON
----------------


CFShld-Configured shielded|Cpybck-CopyBack|CBShld-Copyback Shielded

The /cx switch needed a number for the controller ID.

A quick search turned up the following:

Philip Elder
Microsoft High Availability MVP
MPECS Inc.
Co-Author: SBS 2008 Blueprint Book
www.commodityclusters.com
Our Web Site
Our Cloud Service

Monday, 30 July 2018

Intel Server System R1208JP4OC Base System Device Driver ERROR Fix

We were asked to rebuild a cluster that had both Intel Server System R1208JP4OC nodes go blotto.

After installing Windows Server 2012 R2 the first step is to install the drivers. But, after installing the most recent Intel Chipset Drivers file we still saw the following:

image

Base System Device: Error

After a bit of finagling around we figured out that version 10.1.2.86_Public shown in the above snip cleared things up nicely.

image

PowerShell found in our Kepler-47 Setup Guide # DRIVERS section

Thanks for reading! :)

Philip Elder
Microsoft High Availability MVP
MPECS Inc.
Co-Author: SBS 2008 Blueprint Book
www.s2d.rocks !
Our Web Site
Our Cloud Service

Thursday, 26 July 2018

Hypervisor, Cluster, and Server Hardware Nomenclature (A quick what's what)

100 Level Post

When helping folks out there seems to be a bit of confusion on what means what when it comes to discussing the software or hardware.

So, here are some definitions to help clear the air.

  • NIC
    • Network Interface Card
    • The card can have one, two, four, or more ports
    • Get-NetAdapter
    • Get-NetLbfoTeam
  • Port
    • The ports on the NIC
  • pNIC
    • pNIC = NIC
    • A physical NIC in a hypervisor host or cluster node
  • vNIC
    • The virtual NIC in a Virtual Machine (VM)
    • In-Guest: Get-NetAdapter
    • In-Guest: Get-NetIPAddress
  • vSwitch
    • The Virtual Switch attached to a vNIC
    • Get-VMSwitch
  • Gb
    • Gigabit =/= Gigabyte (GB)
    • 1 billion bits
  • GB
    • Gigabyte =/= Gigabit (Gb)
    • 1 billion bytes
  • 10GbE
    • 10 Gigabit Ethernet
    • Throughput @ line speed ~ 1GB/Second (1 Gigabyte per Second)
  • 100GbE
    • 100 Gigabit Ethernet
    • Throughput @ line speed ~ 10GB/Second (10 Gigabytes per Second)
  • pCore
    • A physical Core on a CPU (Central Processing Unit)
  • vCPU
    • A virtual CPU assigned to a VM
    • Is _not_ a pCore or assigned to a specific pCore by the hypervisor!
    • Please read my Experts-Exchange article on Hyper-V especially the Virtual CPUs and CPU Cores section mid-way down it's free to access
    • Set-VMProcessor VMNAME -Count 2
  • NUMA
    • Non-Uniform Memory Access
    • A Memory Controller and the physical RAM (pRAM) attached to it is a NUMA node

A simple New-VM PowerShell script is here. This is our PowerShell Guide Series that has a number of PowerShell and CMD related scripts . Please check them out and back every once in a while as more scripts are on the works.

Think something should be in the above list? Please comment or feel free to ping us via email.

Philip Elder
Microsoft High Availability MVP
MPECS Inc.
Co-Author: SBS 2008 Blueprint Book
www.commodityclusters.com
Our Web Site
Our Cloud Service

Tuesday, 24 July 2018

Mellanox SwitchX-2 MLNX-OS Upgrade Stall via WebGUI and MLNX-OS to Onyx Upgrade?

Yesterday, we posted about our OS update process and the grids that indicated the proper path to the most current version.

A catch that became apparent was that there were two streams of updates available to us:

  1. image-PPC_M460EX-3.6.4112.img
  2. onyx-PPC_M460EX-3.6.4112.img
    • ETC
    • image

As can be seen in the snip above we read an extensive number of Release Notes (RN) and User Manuals (UM) trying to figure out what was what and which was which. :S

In the end, we opened a support ticket with Mellanox to figure out why our switches were stalling on the WebGUI upgrade process and why there was a dearth of documentation indicating anything about upgrade paths.

The technician mentioned that we should use CLI to clean-up any image files that may be left over. That's something we've not had to do before.

Following the process in the UM to connect via SSH using our favourite freebie tool TeraTerm we connected to both switches and found only one file to delete:

  • WebImage.tbz

Once that file was deleted we were able to initiate the update from within the WebGUI without error on both switches.

Since we had MLNX-OS 3.6.4112 already installed the next question for the tech was, "How do we get to the most current version of Onyx?"

The process was as follows:

  1. Up to MLNX-OS 3.6.4112
  2. Up to Onyx 3.6.6000
  3. Up to Onyx 3.6.8008

As always, check out the Release Notes (RN) to make sure that the update will not cause any problems especially with in-production NICs and their firmware!

image

Happy News! Welcome to Onyx

Philip Elder
Microsoft High Availability MVP
MPECS Inc.
Co-Author: SBS 2008 Blueprint Book
www.s2d.rocks !
Our Web Site
Our Cloud Service

Monday, 23 July 2018

Mellanox SwitchX-2 and Spectrum OS Update Grids

We're in the process of building out a new all-flash based Kepler-64 2-node cluster that will be running the Scale-Out File Server Role. This round of testing will have several different rounds to it:

  1. Flat Flash Intel SSD DC S4500 Series
    • All Intel SSD DC S4500 Series SATA SSD x24
  2. Intel NVMe PCIe AIC Cache + Intel SSD DC S4500
    • Intel NVMe PCIe AIC x4
    • Intel SSD DC S4500 Series SATA SSD x24
  3. Intel Optane PCIe AIC + Intel SSD DC S4500
    1. Intel Optane PCIe AIC x4
    2. Intel SSD DC S4500 Series SATA SSD x24

Prior to running the above tests we need to update the operating system on our two Mellanox SwitchX-2 MSX1012B series switches as we've been quite busy with other things!

Their current OS level is 3.6.4006 so just a tad bit out of date.

image

The current OS level for SwitchX-2 PPC switches is 3.6.8008. And, as per the Release Notes for this OS version we need to do a bit of a Texas Two-Step to get our way up to current.

image

image

Now, here's the kicker: There is no 3.6.5000 on Mellanox's download site. The closest version to that is 3.6.5009 which provides a clarification on the above:

image

Okay, so that gets us to 3.6.5009 that in turn gets us to 3.6.6106:

image

And that finally gets us to 3.6.8008:

image

Update Texas Two Step

To sum things up we need the following images:

  1. 3.6.4122
  2. 3.6.5009
  3. 3.6.6106
  4. 3.6.8008

Then, it's a matter of time and a bit of patience to run through each step as the switches can take a bit of time to update.

image

A quick way to back up the configuration is to click on the Setup button then Configurations then click the initial link.

image

Copy and paste the output into a TXT file as it can be used to reconfigure the switch if need-be via the Execute CLI commands window just below it.

As always, it pays to read that manual eh! ;)

NOTE: Acronym Finder: AIC = Add-in Card so not U.2.

Oh, and be patient with the downloads as they are _slow_ as molasses in December as of this writing. :(

image

Philip Elder
Microsoft High Availability MVP
MPECS Inc.
Co-Author: SBS 2008 Blueprint Book
www.s2d.rocks !
Our Web Site
Our Cloud Service

Thursday, 7 June 2018

Exchange 2013+: Set Up a Receive Connector for MFP/Copier/Device Relay

The following are the two steps required to enable an internal anonymous relay in Exchange 2013/2016/20*.

Step 1: Create the Receive Connector

New-ReceiveConnector –Name MFP-APP-AnonRelay –Usage Custom –Bindings 0.0.0.0:25 –RemoteIPRanges 192.168.25.1-192.168.25.10,192.168.25.225-192.168.25.254 –Comment “Allows anonymous relay” –TransportRole FrontEndTransport –AuthMechanism None –PermissionGroups AnonymousUsers

Variables:

  • -Name: Change this if needed but must match for both steps
  • -RemoteIPRanges: Only put trusted device IP addresses in this section

Once the receive connector is set up it can be managed via EAC.

Step 2: Allow Anonymous Rights

Get-ReceiveConnector “MFP-APP-AnonRelay” | Add-ADPermission -User “NT AUTHORITY\ANONYMOUS LOGON” -ExtendedRights “Ms-Exch-SMTP-Accept-Any-Recipient”

Variable:

  • The Receive Connector name must match the one set in Step 1

Conclusion

Once the above steps are set up there is no need to set a username and password on any device that has an allowed IP.

For obvious reasons one should never put an Internet IP address in this rule! But, that being said, one always denies all SMTP 25/587 inbound traffic to a third party sanitation provider's subnets right (we use ExchangeDefender for our own and our client's needs)?

Also, this setup is for on-premises Exchange.

Philip Elder
Microsoft High Availability MVP
MPECS Inc.
Co-Author: SBS 2008 Blueprint Book
Our Web Site
Our Cloud Service

Thursday, 31 May 2018

OS Guide: Slipstream Updates and Drivers Using DISM and OSCDImg

We've posted another guide to our Web site.

Using the script on this page in an elevated CMD allows us to take the base Install.WIM for Windows Server 2016 and slipstream the latest Cumulative Update into it.

Then, the script copies the updated Install.WIM into two separate folders where we keep two sets of installer files/folders. One is a Bare version that has only the Windows installer files. The other contains a whole host of drivers, BIOS and firmware updates, and a copy of the newly minted .ISO file. We use the FULL version for our USB flash drives (blog post) that get permanently plugged into all server systems we deploy.

This script is constantly updated.

Another will be posted at a later date that also includes the ability to update the Install.WIM file with drivers.

UPDATE 2018-06-04: Fixed the link!

Philip Elder
Microsoft High Availability MVP
MPECS Inc.
Co-Author: SBS 2008 Blueprint Book
Our Web Site
Our Cloud Service

Tuesday, 1 May 2018

PowerShell Guide Series: Storage Spaces Direct PowerShell Node Published

Apologies for the double post, one of the bulleted links was broken. :(

One of the difficult things about putting our setup guides on our blog was the fact that when we changed them, which was frequent, it became a bit of a bear to manage.
So, we're going to be keeping a set up guides on our site to keep things simple.

The first of the series has been published here:

This guide is a walkthrough to set up a 2-Node Storage Spaces Direct (S2D) cluster node from scratch. There are also steps in there for configuring RoCE to allow for more than two nodes if there is a need.
We will be updating the existing guides on a regular basis but also publishing new ones as we go along.

Thanks for reading!

Philip Elder
Microsoft High Availability MVP
MPECS Inc.
Co-Author: SBS 2008 Blueprint Book
Our Web Site
Our Cloud Service

PowerShell Guide Series: Storage Spaces Direct PowerShell Node Published

One of the difficult things about putting our setup guides on our blog was the fact that when we changed them, which was frequent, it became a bit of a bear to manage.
So, we're going to be keeping a set up guides on our site to keep things simple.
The first of the series has been published here:
This guide is a walkthrough to set up a 2-Node Storage Spaces Direct (S2D) cluster node from scratch. There are also steps in there for configuring RoCE to allow for more than two nodes if there is a need.
We will be updating the existing guides on a regular basis but also publishing new ones as we go along.
Thanks for reading!
Philip Elder
Microsoft High Availability MVP
MPECS Inc.
Co-Author: SBS 2008 Blueprint Book
Our Web Site
Our Cloud Service

Wednesday, 21 June 2017

S2D: Mellanox Prep – Connecting to the Switches via SSHv2

To update the Mellanox switch pair we can use the Web interface.

 image

Or, we could use the command line.

But, just what utility should we use to do that?

For us, we’ve been using Tera Term for the longest time now.

It’s a simple utility to use and best of all, it’s free!

Now, it took a _long_ while to figure out how to get in via SSHv2! Note that in our case the two switches we have in our Proof-of-Concept (PoC) setup were demo units we ended up purchasing.

During the first SSH connection the switch should prompt to run the Mellanox configuration wizard which it did for  as seen below:

image

Here are the steps we took to get connected:

  • HOSTNAME: 14 Characters or less (NETBIOS)
  • IP Address: Static or DHCP Reserved
  • DNS: Set up DNS A Record for HOSTNAME at IP
  • Tera Term: Use challenge/response to log in
    • image

We’re now off to get our switches set up for RoCE (RDMA over Converged Ethernet).

Philip Elder
Microsoft High Availability MVP
MPECS Inc.
Co-Author: SBS 2008 Blueprint Book
Our Cloud Service
Twitter: @MPECSInc

Friday, 16 June 2017

S2D: Mellanox Prep for RoCE RDMA

We are in the process of setting up a pair of Mellanox SX1012B (40GbE) switches and CX354A ConnectX-3 Pro NICs (CX3) for a Storage Spaces Direct (S2D) four node cluster.

Setup:

  • (2) MSX1012B Switches
  • (2) NETGEAR 10GbE Switches
  • Intel Server System R2224WTTYS
    • (2) CX354A NICs per Node
    • (2) Intel X540-T2 10GbE NICs

The Mellanox gear will provide the East-West path between nodes while the NETGEAR/Intel 10GbE will provide for node access and the virtual switch setup.

Out of the box, the first thing to look at is … the Release Notes for the MLNX-OS version v3.6.3508 that is current as of this writing.

As we can see, the firmware level we need to have on our CX3 NICs:

image
The most current version of the CX3 firmware is 2.4.7000 which we had downloaded prior to reading the release notes. ;)
We will make sure to install 2.40.5030 once we are ready to do so:

image
Now, as far as the Mellanox switch OS goes (MLNX-OS), there may be a bit of a process needed depending on how old the current OS is on them!

imageimage2.5Upgrade From Previous Releases
Older versions of MLNX-OS may require upgrading to one or more intermediate versions prior to upgrading to the latest. Missing an intermediate step may lead to errors. Please refer to Table 2and Table 3 to identify the correct upgrade order.
Note that there are two types of switch operating systems depending on the underlying hardware. In our case, it is PPC as opposed to x86.

In our case, the current OS version is 3.4.0012, so our process will be:

  1. 3.4.0012 –> 3.4.2008
  2. 3.4.2008 --> 3.5.1016
  3. 3.5.1016 –> 3.6.2002
  4. 3.6.2002 –> 3.6.3004
  5. 3.6.3004 –> 3.6.3508

Fortunately, the Mellanox download site makes picking and choosing the various downloads a simple process.

This is what the update process looks like:

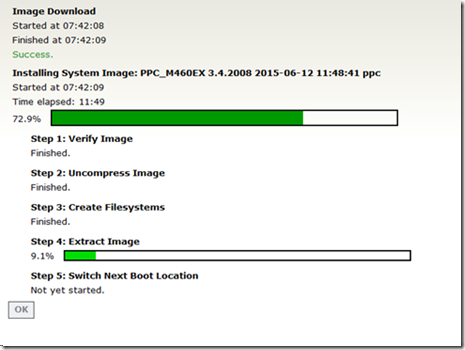
image

image

One can expect to budget between 30-90 minutes per upgrade session.

NOTE: When both switch management consoles were opened in separate IE tabs one would fail out on the upload after a minute or so. Once we opened a separate Firefox browser session for one of the switches the upgrade moved seamlessly.

Once complete, we will move on to our preliminary settings scope for this project.

Philip Elder
Microsoft High Availability MVP
MPECS Inc.
Co-Author: SBS 2008 Blueprint Book
Our Cloud Service
Twitter: @MPECSInc

Monday, 13 February 2017

Installing Windows: Updating Drivers for Boot.WIM and Install.WIM

We have a number of clients that are going to be on Windows 7 Enterprise 64-bit for the foreseeable future.
Most, if not all, of the laptops we are deploying today require a few BIOS tweaks to turn off uEFI and SecureBoot prior to beginning the setup process.
Once that is done, the laptops we are deploying today have wired and wireless network, chipsets, and USB 3 ports that have no drivers in the Windows 7 Boot.WIM or Install.WIM files. So, we would be left stranded when trying to deploy an operating system (OS) via flash!
Given the amount of application updates most of our clients have we decided to avoid using MDT or other imaging software to deploy a new laptop. The time savings would be negligible since we’d be stuck running all of the application updates or new installs post OS deployment anyway.
Also, when installing an operating system via USB 3 flash drive with decent read speeds it only takes a few minutes to get through the base OS install. Windows 10 can have an entire OS install done in a few minutes.
The following instructions assume the files have already been extracted to a bootable flash drive to use for installing an OS on a new machine.
Here’s a simple step-by-step for updating the drivers for a Windows 7 Professional Install.WIM:
  1. Dism /Get-WimInfo /WimFile:D:\sources\install.wim
    • Where D: = the flash drive letter
  2. Dism /Mount-Wim /WimFile:D:\sources\install.wim /Name:"Windows 7 PROFESSIONAL" /MountDir:C:\Mount
    • Change C: to another drive/partition if required
    • NOTE: Do not browse the contents of this folder!
  3. Dism /Image:L:\mount /Add-Driver /Driver:C:\Mount_Driver /Recurse
    • Again, change C: to the required drive letter
    • We extract all drivers to be installed or updated to this folder
  4. Dism /unmount-Wim /mountdir:L:\mount /commit
    • This step will commit all of the changes to the .WIM file
    • NOTE: Make sure there are _no_ Windows/File Explorer, CMD, or PowerShell sessions sitting in the C:\Mount folder or the dismount will fail!
  5. Dism /unmount-Wim /mountdir:L:\mount /Discard
    1. Run this command to dismount the .WIM
The following is the process for updating the WinPE Boot.WIM:
  1. Dism /Get-WimInfo /WimFile:D:\sources\boot.wim
  2. Dism /Mount-Wim /WimFile:D:\sources\boot.wim /Name:"Microsoft Windows Setup (x64)" /MountDir:C:\Mount
  3. Dism /Image:C:\mount /Add-Driver /Driver:C:\Mount_Driver /Recurse
  4. Dism /unmount-Wim /mountdir:C:\mount /commit
The above process can be used to install the newest RAID driver into a Windows Server Boot.WIM and Install.WIM to facilitate a smoother install via flash drive.
Currently, we are using Kingston DTR3.0 G2 16GB flash drives as they have good read and decent write speeds. Please feel free to comment with your suggestions on reasonably priced 16GB and 32GB USB 3 flash drives that have good read and write speeds.
Good to us is ~75MB/Second read and ~35MB/Second write.
Thanks for reading! :)
Philip Elder
Microsoft High Availability MVP
MPECS Inc.
Co-Author: SBS 2008 Blueprint Book
Our Cloud Service
Tuesday, 26 April 2016

Remote Desktop Services 301: Some Advanced RDS Setup Guidelines

Here are some of the key tenants we’ve picked up deploying standalone and farm based Remote Desktop Services (RDS) for our Small Business Solution (SBS) on-premises and in our cloud.

Virtual Desktop Infrastructure, or VDI for short, covers both Remote Desktop Services standalone, farm, and desktop operating system deployments.

This list, while not totally comprehensive, covers a lot of ground.

  • Hardware, Storage, and Networking
    • GHz and Cores are king
      • Balance core count and GHz versus cost
      • NOTE: Server 2016 licensing will be, and is as of this writing, based on core count!
        • Today is 2 sockets tomorrow is a server total of 16 cores
        • Additional Cores purchased in pairs
        • Example 1: Dual Socket 8 Core pair = 16 Cores total so OK in current and 2016 licensing
        • Example 2: Dual Socket 12 Core pair = 24 Cores total so base license of 16 Cores plus a purchase of 4 licenses (2 cores per license) would be required
        • NOTE: Examples may not line up with actual license terms! Please verify when 2016 goes live.
    • RAM is cheap so load up now versus later
    • Balanced RAM setup is better than Unbalanced
      • Balanced: 4x 16GB in primary memory channel slot
        • Best performance
      • Unbalanced: 4x 16GB in primary and 4x 8GB in secondary
        • Performance hit
    • ~500MB of RAM per user per session to start
    • 25-50 IOPS per user depending on workloads/workflows RDS/VDI
      • Average 2.5” 10K SAS is ~250 to 400 IOPS depending on stack format (stripe/block sizes)
    • Latency kills
      • Direct Attached SAS or Hyper-Converged is best
      • Lots of small reads/writes
    • Average 16bpp RDS session single monitor 23” or 24” wide: ~95KB/Second
      • Average dual monitor ~150KB/Second
      • Bandwidth use is reduced substantially with a newer OS serving and connecting remotely (RDP version)
  • LoBs (Line of Business applications)
    • QuickBooks, Chrome, Firefox, and Sage are huge performance hogs in RDSH
      • Be mindful of LoB requirements and provision wisely
    • Keep the LoB database/server backend somewhere else
    • In larger settings dedicate an RDSH and RemoteApp to the resource hog LoB(s)
  • User Profile Disks
    • Office 2013 and Exchange 2013 are a wash in this setting
      • Search is difficult if not broken
    • Search Index database will bloat and fill the system disk! (Blog post with “fix”)
    • Office 2016, though still a bit buggy as of this writing, and Exchange 2016 address UPDs and search
    • Be mindful of network fabrics between UPDs and RDSH(s)
    • Set the UPD initial size a lot larger than needed as it can’t be changed later without a series of manual steps
      • UPDs are dynamic
      • Keep storage limits in mind because of this
  • Printing
    • Printers with PCL 5/6 engines built-in are preferred
      • Host-based printers are a no-go for us
    • HP Professional series LaserJet printers are our go-to
    • HP MFPs are preferred over Copiers
      • Copier engines tend to be hacked into Windows while the HP MFP is built as a printer out of the box

Previous post on the matter: Some Remote Desktop Session Host Guidelines.

Here’s a snippet of Intel’s current Intel Xeon Processor E5-2600v4 line sorted by base frequency in GHz:

image

Depending on the deployment type we’re deploying either E5-2643v4 or E5-2667v4 processors for higher density setups at this time. We are keeping at or under eight cores per socket unless we absolutely require more due to the upcoming sockets to cores changes in Windows Server licensing.

If you’d like a copy of that spreadsheet ping us or visit the Intel Ark site.

Philip Elder
Microsoft High Availability MVP
MPECS Inc.
Co-Author: SBS 2008 Blueprint Book
Our Cloud

Saturday, 6 February 2016

Hyper-V Virtualization 101: Some Basics Around Hyper-V Setups

Here are some pearls learned over our years working with Hyper-V:
  • Host/Node Setup
    • Make sure the host and all nodes in a cluster have the BIOS Settings identical (All settings)
    • Leave ~1GB to 1.5GB physical RAM to the host
    • We leave 1.5GB of space on a dedicated to VM LUN
    • We leave ~50GB to ~100GB of free space on a shared LUN/Partition
    • We set the MiniDump option and lock the swap file down to 840MB
      • wmic RECOVEROS set DebugInfoType = 3
    • Always set up a standalone host with two partitions: OS and Data
  • Hyper-V
    • Hyper-V lays out a file equivalent in size to the vRAM assigned to VMs. We must have space for them.
    • Snapshots/CheckPoints create differencing disks. These _grow_ over time.
    • Deleting Snapshots/CheckPoints requires enough free space to create an entirely new Parent VHDX.
    • vRAM assigned to the VM should not traverse NUMA nodes (performance) (more on hardware).
    • vCPUs = Threads in CPU and must be processed in parallel thus # physical cores - 1 is best.
    • GHz is preferred over CPU Core counts for most workloads.
  • Storage
    • Be aware of the IOPS required to run _all_ workloads on the host/nodes.
    • More smaller sized spindles is better than less larger size spindles = More IOPS.
    • 10GbE should be the minimum bandwidth considered for any iSCSI deployments.
    • At least _two_ 10GbE switches are mandatory for the storage path
  • Networking
    • Broadcom physical NIC ports must always have VMQ turned off (blog post)
    • We prefer to use Intel Gigabit and 10Gb Ethernet Server Adapters
    • We start with a minumum of 4 physical ports in our hosts/nodes
  • UPS Systems
    • UPS Systems should have at least 1-1.5 Hours of runtime.
    • Host/Nodes and storage should be tested for shutdown durations.

There are quite a lot of these types of posts on our blog. Please click through the category tags to find more!

Thanks for reading.

Philip Elder
Microsoft High Availability MVP
MPECS Inc.
Co-Author: SBS 2008 Blueprint Book

Thursday, 28 January 2016

Cluster: A Simple Cluster Storage Setup Guide

In a cluster setting we have a set way to configure our shared storage whether it resides on a SOFS (Scale-Out File Server) cluster or some sort of network based storage.

First, the process to set up the storage itself:

  1. Configure the LUN
    • LUN ID must be identical for all Hyper-V nodes for SAN/NAS
  2. Connect all nodes to the storage
    • iSCSI Target for SAN/NAS
  3. Format NTFS and set OFFLINE on Node01
  4. Node2 and up ignore Initialize in Disk Management and set OFFLINE
    • This step is optional depending on the setup

When it comes to the storage we configure the following LUNs for all of our cluster setups;

  1. 1.5GB LUN
    • Set up for the Witness Disk
    • Add to Cluster Storage but NOT CSV
  2. ???GB LUN
    • Sum of all physical RAM on the nodes plus 150GB
    • Add to Cluster Shared Volumes
    • All Hyper-V nodes set to deliver VM settings files to this location
    • Don’t forget that Hyper-V writes a file that is equivalent in size for _all_ VMs running on the cluster or standalone host!
  3. Minimum 50% Storage LUN x2
    • Divide the remaining storage into two or more LUNs depending on workload and storage requirements
    • A minimum of 2 LUNs allows for storage load to be shared across the SAN’s two storage controllers, the two iSCSI networks, and the two or more Hyper-V nodes

In a SOFS setting we set up a File Share Witness for our Hyper-V compute clusters and deliver the HA shares via SMB Multichannel and a minimum of 10GbE for the VHDX files.

PowerShell

The PowerShell steps for any of the above are here to avoid copy and paste issues.

Set Default Paths:

Set-VMHost -VirtualHardDiskPath “C:\ClusterStorage” –VirtualMachinePath “C:\ClusterStorage\Volume1”

We point the VHDX setting to the CSV root just in case. Our PowerShell scripts for setting up VMs put the VHDX files into the right storage location.

Set Quorum Up:

Set-ClusterQuorum -NodeAndDiskMajority "Cluster Virtual Disk (Witness Disk)"

Philip Elder
Microsoft High Availability MVP
MPECS Inc.
Co-Author: SBS 2008 Blueprint Book