Showing posts with label Firmware Update. Show all posts

Tuesday, 9 April 2019

IMPORTANT: CRITICAL Firmware Update for Intel SSD DC S4510 and S4610

The Intel SSD DC S4510 and S4610 series SATA SSDs have a critical flaw where after 1,700 hours of idle time, meaning on but not working, they brick.

The following is from the Release Notes for the update:

Intel® Solid State Drive DC S4510 and S4610 Series Revision History

History

Date

Firmware

March 2019

XC311102(MR1)

XCV10110(MR1)

The following changes are included in this firmware update:

Resolved issue related to intermittent drive drop during initial boot.

Resolved 1.92TBand 3.84TB SKUs may become unresponsive at 1700hrs. of cumulative Idle Power On Hours.

Intel direct download can be found here: Intel® SSD Data Center Tool (Intel® SSD DCT)

For OEM provided applications check with the vendor's support site to find out if there is an update available.

This is a _critical data loss scenario_ and should be dealt with ASAP!

Philip Elder
Microsoft High Availability MVP
MPECS Inc.
Co-Author: SBS 2008 Blueprint Book
www.s2d.rocks !
Our Web Site
Our Cloud Service

Tuesday, 24 July 2018

Mellanox SwitchX-2 MLNX-OS Upgrade Stall via WebGUI and MLNX-OS to Onyx Upgrade?

Yesterday, we posted about our OS update process and the grids that indicated the proper path to the most current version.

A catch that became apparent was that there were two streams of updates available to us:

  1. image-PPC_M460EX-3.6.4112.img
  2. onyx-PPC_M460EX-3.6.4112.img
    • ETC
    • image

As can be seen in the snip above we read an extensive number of Release Notes (RN) and User Manuals (UM) trying to figure out what was what and which was which. :S

In the end, we opened a support ticket with Mellanox to figure out why our switches were stalling on the WebGUI upgrade process and why there was a dearth of documentation indicating anything about upgrade paths.

The technician mentioned that we should use CLI to clean-up any image files that may be left over. That's something we've not had to do before.

Following the process in the UM to connect via SSH using our favourite freebie tool TeraTerm we connected to both switches and found only one file to delete:

  • WebImage.tbz

Once that file was deleted we were able to initiate the update from within the WebGUI without error on both switches.

Since we had MLNX-OS 3.6.4112 already installed the next question for the tech was, "How do we get to the most current version of Onyx?"

The process was as follows:

  1. Up to MLNX-OS 3.6.4112
  2. Up to Onyx 3.6.6000
  3. Up to Onyx 3.6.8008

As always, check out the Release Notes (RN) to make sure that the update will not cause any problems especially with in-production NICs and their firmware!

image

Happy News! Welcome to Onyx

Philip Elder
Microsoft High Availability MVP
MPECS Inc.
Co-Author: SBS 2008 Blueprint Book
www.s2d.rocks !
Our Web Site
Our Cloud Service

Monday, 23 July 2018

Mellanox SwitchX-2 and Spectrum OS Update Grids

We're in the process of building out a new all-flash based Kepler-64 2-node cluster that will be running the Scale-Out File Server Role. This round of testing will have several different rounds to it:

  1. Flat Flash Intel SSD DC S4500 Series
    • All Intel SSD DC S4500 Series SATA SSD x24
  2. Intel NVMe PCIe AIC Cache + Intel SSD DC S4500
    • Intel NVMe PCIe AIC x4
    • Intel SSD DC S4500 Series SATA SSD x24
  3. Intel Optane PCIe AIC + Intel SSD DC S4500
    1. Intel Optane PCIe AIC x4
    2. Intel SSD DC S4500 Series SATA SSD x24

Prior to running the above tests we need to update the operating system on our two Mellanox SwitchX-2 MSX1012B series switches as we've been quite busy with other things!

Their current OS level is 3.6.4006 so just a tad bit out of date.

image

The current OS level for SwitchX-2 PPC switches is 3.6.8008. And, as per the Release Notes for this OS version we need to do a bit of a Texas Two-Step to get our way up to current.

image

image

Now, here's the kicker: There is no 3.6.5000 on Mellanox's download site. The closest version to that is 3.6.5009 which provides a clarification on the above:

image

Okay, so that gets us to 3.6.5009 that in turn gets us to 3.6.6106:

image

And that finally gets us to 3.6.8008:

image

Update Texas Two Step

To sum things up we need the following images:

  1. 3.6.4122
  2. 3.6.5009
  3. 3.6.6106
  4. 3.6.8008

Then, it's a matter of time and a bit of patience to run through each step as the switches can take a bit of time to update.

image

A quick way to back up the configuration is to click on the Setup button then Configurations then click the initial link.

image

Copy and paste the output into a TXT file as it can be used to reconfigure the switch if need-be via the Execute CLI commands window just below it.

As always, it pays to read that manual eh! ;)

NOTE: Acronym Finder: AIC = Add-in Card so not U.2.

Oh, and be patient with the downloads as they are _slow_ as molasses in December as of this writing. :(

image

Philip Elder
Microsoft High Availability MVP
MPECS Inc.
Co-Author: SBS 2008 Blueprint Book
www.s2d.rocks !
Our Web Site
Our Cloud Service

Thursday, 26 June 2014

CRITICAL: Seagate 1200 SSD Firmware Update Required for 2012 R2 Storage Spaces

We got hit with this today:

image

  • Get-PhysicalDisk

Since this was our second run at standing up this Scale-Out File Server cluster with things not working as expected we began to dig in.

During a Space creation process the symptom of the Volume Format phase hitting an error happened. We jumped into PowerShell to poll the disks right then and saw the above.

The Disks:

image

  • Get-PhysicalDisk | where MediaType -eq SSD | ft Model,FirmwareVersion -AutoSize

The PowerShell to get the above information along with the serial numbers:

  • Get-PhysicalDisk | where MediaType -eq SSD | ft Model,FirmwareVersion,SerialNumber -AutoSize

Go to Seagate's Support site and choose the Download Finder.

image

Enter the serial number, just the first set of digits before the four 0000 pattern as the number was repeated twice for us, your country, and then under Certificate click on the Click here link and _not_ the Email Me link.

image

The highlighted link downloads the actual firmware ZIP file.

A copy of Seagate's SeaTools is required to update the drive's firmware.

If the SSDs are in a cluster setting, as they are here, make sure to properly drain the nodes and shut down the cluster (TechNet). Then shut down all nodes but one.

Run the firmware update and reboot that node. Bring the Cluster back online and fire up the other nodes one by one.

NOTE: We have _not_ tested this firmware yet.

A Microsoft Forum post brought us into the right direction: Clustered Storage space degraded and SSD disks "starting".

Remember how it has been mentioned ad nauseam on this blog about how we are very careful about testing our deployments? Well, in this case we were a part of the planning phases for this cluster but did not have access to these particular SSDs prior to deploying in a Michigan Data Centre.

This situation sure brings home the point that we _always_ need to test our setups before deploying them at client sites or on behalf of our clients.

EDIT: Brain was five steps ahead of fingers so the "Firmware Update" in the title never made it into the original post! :)

Philip Elder
Microsoft Cluster MVP
MPECS Inc.
Co-Author: SBS 2008 Blueprint Book
Chef de partie in the SMBKitchen ASP Project
Find out more at
Third Tier: Enterprise Solutions for Small Business

Saturday, 6 July 2013

Updating the Intel Modular Server from v6.5 to v6.8 Involves Taking the Storage Controllers Offline

We are in the process of updating the firmware on our Intel Modular Server from v6.5 to v6.8 on our way up to v6.10.

When we uploaded the file using Modular Server Control (MSC) we came to the point where the firmware would not go any further before we reset the Storage Controllers into Safe Mode.

image

The process of flipping the two Storage Controllers into Safe Mode takes about five to ten minutes with a few CONFIRM steps required.

Once they are offline, we are able to move on with our firmware updates:

image

Given that storage is offline this particular update will need to be run after hours. A backup is mandatory for any servers whether physical or virtual prior to running this update (we only back up the guests in the case of a Hyper-V Failover Cluster).

image

IE10 is a waste of time. IE9 in Compatibility Mode with the MSC in Trusted Sites will work for the most part. Third Party browser may be the best option for this process.

Note that the IMS will go into Limp Mode once the first SCM goes offline. That means that hearing protection should be worn during the process.

image

The update process can take anywhere from 40 to 60 minutes to complete. Please budget time for this process accordingly.

Intel Modular Server Support:

Philip Elder
MPECS Inc.
Microsoft Small Business Specialists
Co-Author: SBS 2008 Blueprint Book

Chef de partie in the SMBKitchen
Find out more at
www.thirdtier.net/enterprise-solutions-for-small-business/

Windows Live Writer

Tuesday, 23 October 2012

Zalman ZM-VE300 Firmware Upgrade Available

We found the ZM-VE300 almost useless when we first received it as the firmware was really buggy.

  • Zalman Updates Page
    • Category: Storages
    • Sub Category: External HDD/SSD Cases
    • Product: ZM-VE300
    • image

The firmware available as of this writing is R1005N.

image

image

Once we reached a fairly stable firmware version a number of months back we were able to select the applicable OS ISO to load on a system then press the top button and hold it to “Save” the ISO setting.

We could then unplug the VE300, plug it into the new system, and boot to the ISO as though it were an attached optical drive with the OS DVD in it.

Having a few of these units around the shop for quick access to OS ISOs for installing a new system or re-installing an existing system is a huge time saver.

Plus, we don’t have a bunch of larger USB2 sticks that would otherwise be needed to hold all of the OS files that were extracted from the ISOs.

One of the benefits of having the ISO appear as an optical drive is for older BIOS setups that may or may not have an available Boot Option Menu or possibly no option to boot to an attached USB drive. Some systems, server boards, and laptops today are quite restrictive in what we can use for an external boot device. The Zalman makes this point moot.

Philip Elder
MPECS Inc.
Microsoft Small Business Specialists
Co-Author: SBS 2008 Blueprint Book

Windows Live Writer

Monday, 16 July 2012

Intel Integrated RAID Modules - POST Hang and/or Data Loss Issues

A few Intel Technical Advisory documents to take note of with the first being the most critical.

Description

The PCB’s (Print Circuit Boards) for the controllers listed above are being modified to resolve an AC power cycling cache backup issue with the Intel RAID Smart Battery AXXRS8BU9 and the Intel RAID Maintenance Free Backup Unit AXXRMFBU2 cache backup solutions. In addition to some minor component changes a jumper wire will be added to the PCB’s during manufacturing. Intel has completed product qualification for the changes to verity that there is no impact to product quality and reliability.

Root Cause

During AC power cycle testing Intel found a rare occurrence where data yet to be written to disk from the RAID modules DDR3 memory may be lost even though cache protection is enabled by the Battery Backup Unit (Intel® RAID Smart Battery AXXRSBBU9) or the RAID Maintenance Free Backup Unit (Intel® RAID Maintenance Free Backup Unit A)(XRMFBU2) that is installed. The issue has a very low occurrence rate and is observed on a small percentage of modules. The component changes and jumper wire solution provides a resolution to this issue.

The units we just brought in for a couple of 2 node clusters we are building out do indeed have the jumper wire in place.

With the factory default firmware in place the server will hang during POST. We update all firmware on the server builds and deploys that we do prior to introducing them into a production environment. Once updated we run a series of burn-in tests over a period of days to validate the build.

Firmware, drivers, and more can be had from Intel's Download Centre.

Philip Elder
MPECS Inc.
Microsoft Small Business Specialists
Co-Author: SBS 2008 Blueprint Book

*Our original iMac was stolen (previous blog post). We now have a new MacBook Pro courtesy of Vlad Mazek, owner of OWN.

Windows Live Writer

Monday, 30 May 2011

Hyper-V Error 41 – Hyper-V launch failed; Either VMX not present or not enabled in BIOS and BIOS Update Methodology

We have just finished setting up a lab server that has been sold to an IT Consultant we have been working with for years now.

The server was set up with the existing Intel Xeon 3070 CPU on a new Intel Server Board S3210SHLC with 8GB of Intel certified Kingston ECC RAM.

One of the first things that we do with a new server setup, or an existing server setup that we are working on, is to verify the firmware levels on all components.

  • Server board BIOS, BMC, and FRU/SDR.
  • Hardware RAID controller firmware.
  • Hardware SAS controller firmware.
  • Hot Swap backplane firmware level.

We ran through and updated the firmware on all components in the server setup as they were all out of date to some degree.

The process we run to update the BIOS and firmware on the server board is as follows:

  1. Boot to EFI and run the update.nsh script.
  2. Power down completely after the updates have finished.
  3. After a minute power the server up and let it run all the way through to a “No OS Found” message.
  4. Power the system down again.
  5. Wait for a minute and power it up.
  6. Enter the BIOS.
  7. Make settings changes.
  8. Save and reboot to a “No OS Found” message.
  9. Power down.
  10. Power up and boot to OS install DVD.
  11. Install drivers, configure OS partition, install OS.

We followed that process or so we thought for this particular server.

Once we have Windows Server 2008 R2 Standard SP1 installed we enabled the Hyper-V Role and ran all available Windows Updates.

We configured a Windows 7 desktop OS VM and went to start it when:
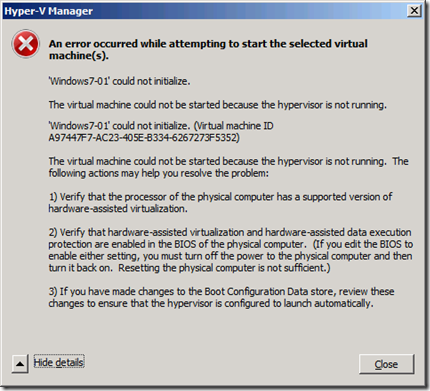
image

Hyper-V Manager

An error occurred while attempting to start the selected virtual machine(s).

‘VirtualMachine’ could not initialize.

The virtual machine could not be started because the hypervisor is not running.

The server logs showed:

image

Event ID 41: Hyper-V-Hypervisor

Hyper-V launch failed; Either VMX not present or not enabled in BIOS.

When we went into the Win2K8 MMC we saw that all three Hyper-V services were indeed running. We ran a restart of all three with one failing to restart.

So, we rebooted the server to see where the BIOS settings were at:

image

They indicate that they are indeed enabled. But, note that the information section states that a full power off and on cycle is required before the settings change will take.

Well, we were sure that we did fully power cycle the box when we were into the BIOS settings after updating it.

Just in case, we shut the server down and pulled the plugs. We let it sit for about a minute and then plugged it in. The server fired up on its own and booted into the OS.

All three Hyper-V services were up and running and there were no more errors in the logs once it finished booting.

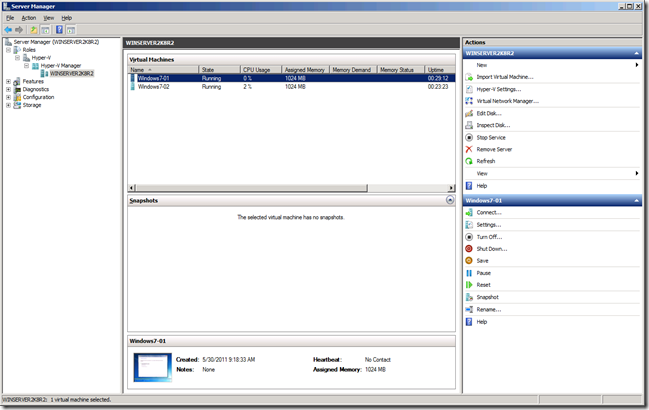
Sure enough, we were able to go on and create the VMs, make the necessary settings changes, and start them.
image

Philip Elder
MPECS Inc.
Microsoft Small Business Specialists
Co-Author: SBS 2008 Blueprint Book

*Our original iMac was stolen (previous blog post). We now have a new MacBook Pro courtesy of Vlad Mazek, owner of OWN.

Windows Live Writer

Thursday, 9 December 2010

Upgrading HP LaserJet’s Firmware via Windows Explorer

Download the newest firmware from HP’s site for the printer in question.

Open the firmware’s folder and extract the firmware.

Open a second Explorer Window and type ftp://192.168.40.5 (printer’s IP) and hit Enter. Double click on the PORT folder to open it.

Copy and past the .RFU file from the network folder to the FTP based folder.

image

The display on the front of the printer will display “Receiving Upgrade”. Once done the printer will reboot itself and show Ready.

On the printer’s management site we should then see the new firmware version displayed:

image

HP has come a long way from connecting either a parallel or USB cable and uploading the firmware file by a series of commands.

Philip Elder
MPECS Inc.
Microsoft Small Business Specialists
Co-Author: SBS 2008 Blueprint Book

*Our original iMac was stolen (previous blog post). We now have a new MacBook Pro courtesy of Vlad Mazek, owner of OWN.

Windows Live Writer

Thursday, 9 September 2010

Intel Modular Server – Adding A Compute Module

We have a 2 node Hyper-V Server 2008 R2 based cluster up and running on our in-house Intel Modular Server.

We have a new Intel Compute Module MFS5520VI that we installed a pair of Intel Xeon Processor X5650 CPUs into along with 24GB of ECC memory (6 x 4GB 1333HMz DDR3).

When the compute module is first plugged in, it will take a few minutes for it to show up in Modular Server Control (MSC):

image

Once the compute module shows up we can click through to the Firmware status page. Once there we will see that the compute module did not turn on automatically:

image

We go ahead and power up the compute module to allow the updates to start.

Back on the firmware status page we will see:

image

Once the BIOS update has completed the compute module will power cycle itself.

We then need to establish a KVM session with the now up to date compute module so that we can get into the BIOS and make the necessary settings changes:

image

The key changes that need to be made have to do with enabling Intel Virtualization acceleration features as well as structuring the boot order between the built-in hard disk and USB flash drives.

We need to verify the boot order because we keep a USB flash drive permanently plugged into each compute module. Each USB flash drive is bootable and contains the Hyper-V Server 2008 R2 OS install files on it.

Now that we have the hardware set up on our new cluster node, we will go ahead and install the Hyper-V Server 2008 R2 OS, install needed drivers, and eventually add the Hyper-V node into our current 2 node cluster.

Philip Elder
MPECS Inc.
Microsoft Small Business Specialists
Co-Author: SBS 2008 Blueprint Book

*Our original iMac was stolen (previous blog post). We now have a new MacBook Pro courtesy of Vlad Mazek, owner of OWN.

Windows Live Writer

Saturday, 4 September 2010

Logitech Cordless Desktop MX 5500 Revolution

We just finished installing a Logitech Cordless Desktop MX 5500 Revolution keyboard and mouse combination kit.

Out of the box, the software that comes with the kit is out of date.

Once the SetPoint drivers have been installed we get a prompt to update the Bluetooth radio:

image

Current firmware version: 1.0.89

New firmware version: 1.1.92

We have had a few of these updates hiccup where the update seemingly goes on without stopping. We then have to force close the update process. When that happens, most of the time we can pull the radio and let it sit for a minute then reattempt the update.

image

In this case though we did not have an issue and are currently typing up this post on the MX 5500 keyboard which has an okay action and key click.

The MX Revolution is, in our opinion, probably one of the best mice that we have ever used. Both the MX and VX series mice are used extensively by us at MPECS.

Philip Elder
MPECS Inc.
Microsoft Small Business Specialists
Co-Author: SBS 2008 Blueprint Book

*Our original iMac was stolen (previous blog post). We now have a new MacBook Pro courtesy of Vlad Mazek, owner of OWN.

Windows Live Writer

Monday, 30 August 2010

Promise VTrak E310sD Firmware Update

The Promise VTrak E310sD that we are deploying to add storage to a Hyper-V cluster running on an Intel Modular Server required a firmware update out of the box:

image

Firmware Version: 3.33.0000.00

Now, the best we can do for a link to the firmware download is twofold:

The reason for that is that Promise seems to change the links that lead directly to a product site, or the links do not seemingly work when copied and pasted from the browser address bar.

Once on the Download Center site, select:

  1. VTrak Ex10 Series
  2. VTrak E310sD (our model number)

We then have a selection of download links associated with the product come up:

image

As of this writing, firmware version 3.34 is the most up to date one.

image

Apple Promise VTrak Caveat

Note that we are working with the Promise OEM product and not the Apple OEM branded Promise VTrak products. There is a completely different firmware set for the Apple branded products.

VTrak Firmware Update

Once the download completes, we extract the contents of the ZIP archive.

In the WebPAM PROe console, we click on the Firmware Update link and “download” the file using the HTTP method there.

image

We then received a warning that once the flashing process starts it should not be interrupted in any way.

A set of progress bars (dual controller) will then show up:

image

Once the update process has completed:

image

The flash upgrade has completed successfully.

It will only take effect at next reboot.

Since we only have the VTrak unit installed, we used the Administrative Tools console to initiate a restart of the VTrak:

image

A warning will pop up indicating that the VTrak will be offline and require us to type “confirm” into a box before it will allow for a restart.

Once a reboot has completed, which took about 5 minutes, we logged on to the WebPAM PROe console and navigated to the Firmware Update tab to confirm that we now had the newest version:

image

Firmware Version: 3.34.000.00

Once our firmware update was complete, we were then ready to move on to the next step of configuring the drives into RAID arrays and logical drives.

Philip Elder
MPECS Inc.
Microsoft Small Business Specialists
Co-Author: SBS 2008 Blueprint Book

*Our original iMac was stolen (previous blog post). We now have a new MacBook Pro courtesy of Vlad Mazek, owner of OWN.

Windows Live Writer

Tuesday, 4 May 2010

Intel Modular Server – v6.1 Firmware Update Package and Other Driver Updates Available

The Intel Modular Server has a new CMM firmware update available:

The new firmware updates the MFS5520VI series compute modules to support a version change in the Intel Xeon Processor 5600 series CPUs. From the v6.1 ReadMe.txt:

E. NEW FEATURES/FUNCTIONS IMPLEMENTED IN THIS RELEASE
Intel® Xeon® 5600 Processor series – Updated Intel® Xeon® Processor 5600 series B1 Microcode to version 0x0C

Here are some driver updates for the following IMS components along with the CMM firmware link:

If the above links do not work beyond this post date then:

As part of the preparation that we do on a new IMS, we update the default firmware on the box following the instructions contained in the v6.1 Install Instructions Release Notes.txt file (direct link to the text file as of this writing). We do so because a new IMS may have a CMM firmware version earlier than v2.7 on it out of the box.

B. GENERAL INFORMATION The system must be at firmware level V2.7, V3.0, V3.6, V4.0, V4.1, V5.0, V5.5 or V6.0 prior to starting this update.

So, keep in mind that an out of the box IMS will take a couple or three hours to run the two firmware updates if it has CMM firmware v2.6 or earlier.

Philip Elder
MPECS Inc.
Microsoft Small Business Specialists
Co-Author: SBS 2008 Blueprint Book

*Our original iMac was stolen (previous blog post). We now have a new MacBook Pro courtesy of Vlad Mazek, owner of OWN.

Windows Live Writer

Saturday, 9 January 2010

Intel Modular Server – CMM Firmware Update To v5.5 Just Released

It seems that v5.0, which was released in mid October, is being updated as of yesterday January 8, 2010.

Version 5.5 of the Intel Modular Server firmware has been released.

Now, if the above link does not work as it does of this writing, then go to the Intel Download Finder site and punch in MFSYS25 to gain access to the latest updates for the IMS.

One of the changes contained within v5.5 is MFS5520VI compute module compatibility for the Intel Westmere 32nm CPU (PDF link).

From the PDF:

image

The CMM version must be v5.5 before inserting an MFS5520VI compute module into the chassis.

Since we already have two Storage Control Modules (SCM) installed, we need not be concerned with the caveats to installing this update.

We will run this update after everything has been flattened in anticipation of our second test run.

For those running, or planning to run, RedHat Enterprise Linux, note the following from the Release Notes (TXT file link):

RedHat* Enterprise Linux 5 Update 4 Dual SCM Support – This release provides support for dual SCM configurations running the RedHat* Enterprise Linux 5 Update 4 operating system. A clean installation of the RedHat* Enterprise Linux 5 Update 4 operating system is required to support dual SCM configurations.

Note the need for an OS reinstall in order to pick up the ability to utilize both Storage Control Modules in RedHat Enterprise Linux.

Intel Download site Tip:

When the search results come up, change the sorting order from Relevance to Date:

image

Sorting everything via date makes it easy to see what has changed since the last time we visited the site.

Philip Elder
MPECS Inc.
Microsoft Small Business Specialists
Co-Author: SBS 2008 Blueprint Book

*Our original iMac was stolen (previous blog post). We now have a new MacBook Pro courtesy of Vlad Mazek, owner of OWN.

Windows Live Writer

Tuesday, 3 November 2009

Intel BIOS and Firmware Updates in EFI Shell

When it comes to updating some of the Intel server configurations that we have put together, we use the EFI Shell to update any server related BIOS and firmware.

The update being run on an Intel Server System SR1560SF this evening choked. It turned out to be some bad files on the USB Flash drive.

The benefit to using the EFI Shell was the ability to pull the USB flash drive, update the files on it, and plug it back in without losing connection to the drive.

Once we forced the BMC update to run we had things up to where we wanted them to be and were able to move on.

Philip Elder
MPECS Inc.
Microsoft Small Business Specialists
Co-Author: SBS 2008 Blueprint Book

*Our original iMac was stolen (previous blog post). We now have a new MacBook Pro courtesy of Vlad Mazek, owner of OWN.

Windows Live Writer

Monday, 2 February 2009

Seagate Officially Releases ES.2 Firmware SN06 and SN16

There are two different firmware updates depending on the part number and size of the ES.2 Drives. Be careful to download and burn the correct firmware update or the drive could be bricked.

Seagate Site: Firmware Update for ST3250310NS, ST3500320NS, ST3750330NS, ST31000340NS [207963].

The downloads are ISO based, so make sure the workstation the ISO is downloaded to can burn it to CD.

If not, we use CDBurnerXP for our ISO burning as it is light and fast.

Philip Elder
MPECS Inc.
Microsoft Small Business Specialists

*All Mac on SBS posts are posted on our in-house iMac via the Safari Web browser.

Thursday, 29 January 2009

Seagate Hard Drive Brick Fix for 7200.11, ES.2 - Possibly

It looks like someone knows a little about the inner workings of Seagate hard drives.

They have posted a series of fix steps for Seagate hard drives that have seemingly bricked themselves because of bad firmware:
There are two separate reasons for the bricking of the drive with a specific methodology to deal with each reason. Keep this in mind. One of the methodologies requires the daughter board to be swapped while powered up leaving lots of room for frying it.

We have used a daughter board swap method to recover data on hard drives in the past. Though there was no power applied.

In this case, we are talking about connecting to the hard drive's underlying firmware structures via an RS232 based terminal session and working with the base level commands to bring the drive back to life.

This methodology is not for the feint of heart. This bears repeating: This methodology is not for the feint of heart.

This particular person has been kind enough to share the fix methodology, so if it is needed then handle with care.

Philip Elder
MPECS Inc.
Microsoft Small Business Specialists

*All Mac on SBS posts are posted on our in-house iMac via the Safari Web browser.

Tuesday, 20 January 2009

Seagate SATA drives and a firmware update

Seagate, it seems, has been experiencing some issues with their Barracuda SATA line of hard drives from a particular manufacturing facility.

We have experienced what seems to us to be an inordinately high number of drive failures on the ES.2 series. Though, in our case the drives die midstream and generally not during a boot of the server.

Previous posts:
Seagate's articles on the matter:
The second article indicates that the drives that we have in production will not have a firmware update yet.

When we have had a dead drive in the past that has spun up with no internal sounds indicating drive heads being flung about within, we have had some success with switching out the daughter cards that contain the electronics.

In this case, we have not had any drive failures related to the firmware situation, so we cannot test to see if this does indeed enable us to gain access to the drive's contents. We have seen some indications that we may not be able to do so.

A small bonus for us is the ability to obtain an RMA from our supplier for one full year after the original purchase and have a replacement drive the following day. The drawback is that we have consistently had the defective drives replaced with identical ones.

Philip Elder
MPECS Inc.
Microsoft Small Business Specialists

*All Mac on SBS posts are posted on our in-house iMac via the Safari Web browser.

Wednesday, 14 May 2008

SR1530AH + PCI-E Riser = SRCSASRB RAID Capable

In the current SR1530HSH/SH line of 1U uniprocessor server systems we no longer need to deal with a standard and LX version of the product.

The 1U SR1530HSH/SH server systems come in 2 SKUs and both have the same motherboard (MB):
  • SR1530SH: With fixed hard drives
  • SR1530HSH with 3 Hot Swap Drive Bays
The cost differential between the fixed hard drive and hot swap hard drive models is relatively small in comparison to the previous generation's steps:
  • SR1530AH: Base model with S3000AH MB and fixed drives
  • SR1530AHLX: Base model with S3000AHLX MB and fixed drives
  • SR1530HAHLX: Premium model with S3000AHLX MB and 3 hot swap drives
The cost differential between the base AH model and the hot swap AHLX model was quite a bit steeper than the current SH models.

So, in some cases we have configured the SR1530AH model with the add-in PCI-E PCB and subsequently an SRCSASRB Intel RAID controller for better drive performance without the need for the LX or hot swap features.

There is a proper sequence for installing and updating the RAID controller's firmware:
  1. Install the Intel RAID controller into the PCI-E Riser card.
  2. Install the riser into the 1U server.
  3. Boot the server and connect to the RAID controller BIOS.
  4. Setup the RAID array(s).
  5. Reboot.
  6. Download the newest SRCSASRB firmware.
  7. Boot to a bootable USB flash drive.
  8. Update the firmware.
  9. Reboot and check into the SRCSASRB settings.
  10. Download the newest S3000AH BIOS.
  11. Boot to a bootable USB flash drive.
  12. Update the BIOS
  13. Reboot and verify the SRCSASRB shows up in the BIOS' hard drive boot order.
  14. Boot into the Windows Server 2008 setup.
  15. Install the SRCSASRB drivers and go from there.
On our first build we updated the SRCSASRB firmware without touching the S3000AH BIOS. In this case, the motherboard revision was a couple of steps back.

After the firmware update and subsequent boot into the Windows Server 2008 setup we kept getting an error message indicating that there was no controller associated with the hard disks listed. The error is identical to the one experienced in a previous Windows Vista setup problem.

In this case though, we rebooted back into the BIOS and sure enough the RAID controller was not listed as one of the boot device options.

Once we updated the board's BIOS we were good to go ... the SRCSASRB showed up in the BIOS as a bootable device and Windows Server 2008 was happy to be installed on the configured array.

Philip Elder
MPECS Inc.
Microsoft Small Business Specialists

*All Mac on SBS posts are posted on our in-house iMac via the Safari Web browser.

Tuesday, 22 January 2008

Intel SS4000-E NAS Firmware Update 1.4

We are in the process of updating the firmware on a client's SS4400-E NAS device.

The newest firmware gives us a number of enhanced features, with the essential one being the ability to plug in 1TB drives.

The firmware update cannot be run from within the standard Web interface on the NAS though. One must go through a particular procedure to follow through on it:
  1. Download the 1.4 firmware file from the SS4000-E Download Page .
  2. Extract the files from the downloaded file and save them to your hard drive on your laptop, desktop, server, etc.
  3. Backup the data on the SS4000-E to another system. (Important to note that data on the array(s) will be destroyed during this process!)
  4. Shutdown the Intel® Entry Storage System SS4000-E system
  5. Unplug all hard disks installed in the Intel® Entry Storage System SS4000-E system.
  6. Boot up the Intel® Entry Storage System SS4000-E system
  7. Login to the system by browsing the main web page:
    1. http://Intel Entry Storage System SS4000-E system’s IP Address/ (Ours defaulted back to 192.168.0.101 - so we set the workstation's IP to static .102)
    2. NOTE: this will display the system initialization screen, not the login screen. DO NOT insert the hard drives.
  8. Enter the following url to display the firmware upgrade page:
    1. https://Intel Entry Storage System SS4000-E system’s IP Address/system_init_vendorF.cgi
  9. Select the v1.4 software package file (fs-bc-v1.4-b709.pkg) to update the flash firmware. (We put it on the desktop of the system we were on for simplicity)
  10. After the previous step completes, the system should be rebooted but without the disks inserted. After the system completes the boot sequence, the disks can be inserted (one at a time while the system is running and wait for the disk LED to illuminate) and scanned for (scan for each disk after the LED illuminates) and the firmware reinstalled. If the firmware package is installed and the disks are reinserted prior to rebooting the system, the system will boot off the drives and not properly complete a clean install. The drives must be inserted while the system is running for this process to complete properly.
    Note that the firmware update process takes a quite a while.

    Also, once one logs in at the Management Web page, the NAS will have picked up a set of IP addresses from the internal DHCP server again. So, make sure to reset the workstation's IP back to DHCP after step 7.

    All in all, the process went very smooth.

    We will also now be utilizing the Active Directory integration on this particular NAS unit to manage user access. This feature simplifies data and folder permissions leaps and bounds over the built in Samba share structure.

    Philip Elder
    MPECS Inc.
    Microsoft Small Business Specialists

    *All Mac on SBS posts are posted on our in-house iMac via the Safari Web browser.