Showing posts with label Product Documentation. Show all posts

Tuesday, 8 January 2013

A Ford Dealership Experience Exemplifies What SMB IT _Can_ Be Like for Clients/Customers – Painful

This is a really good read:

It really brings out the customer’s experience in our own industry with folks that cobble together IT “Solutions” that end up causing them more pain and grief than anything with the, “Oh, it’s Microsoft’s fault that things are broken” being the mantra from the consultant.

Microsoft, having lived with this black eye for so many years has moved very solidly in favour of eliminating the SMB IT Solution set altogether, or at least as much as possible, with the Big Cloud Push.

But, it’s not like Microsoft did not _try_ and do anything about it beforehand.

Remember the SBSC? The Small Business Specialist Community was a _huge_ investment by Microsoft in us and the solution set.

Get trained, get certified, get noticed was essentially the SBSC mantra with a lot of resources to back it up from Microsoft.

It certainly worked for us. We got trained, got certified, and received the logo and the great communication from within Microsoft and the SBSC program.

And, it did indeed differentiate the small business IT Solution Providers that were serious about providing the best solution to their clients from those that flew by the seat of their pants cobbling things together.

Going forward, the on-premises solution set will not be going away. In fact, the on-premises solution set will become all the more important to those businesses that require data ownership to be in-house among other reasons.

Our plan is to continue to get training on the Microsoft products, and certification on key products, we need to build our solution sets.

  • Windows Server 2012
  • System Center 2012
    • Microsoft Private Cloud
  • Microsoft Exchange 2013
    • E-mail infrastructure.
    • Building highly available Exchange environments.
  • SharePoint Server 2013
    • SharePoint Foundation 2013
  • SQL Server

Those clients/customers that have had an IT experience similar the Ford dealership provided to their customer are ripe for the Cloud. And, quite frankly who could blame them?

Philip Elder
MPECS Inc.
Microsoft Small Business Specialists
Co-Author: SBS 2008 Blueprint Book

Windows Live Writer

Monday, 16 January 2012

Thomson Reuters PPC Reference Library Network Install Documentation

The links within the PPC Reference Library installer are broken so we were not able to figure out what we needed to do to install the product for network use.

A search turned up the following support page we need to get to.

The resulting page:

image

We can then click on the Installation Instructions link near the bottom left of the page. We tried to create a link in this post for that one but there is some sort of Session ID associated with it so things break.

After clicking on that link:

image

Again the links are associated with a Session ID so no quick way to the PDF documents.

After going through the documentation it was not 100% clear as far as how to get things going.

But, we ran through the process installing to a network share and then running the network client install via that share afterwards on all client systems with no problems.

Note that there are some installation codes required for the install.

image

Philip Elder
MPECS Inc.
Microsoft Small Business Specialists
Co-Author: SBS 2008 Blueprint Book

*Our original iMac was stolen (previous blog post). We now have a new MacBook Pro courtesy of Vlad Mazek, owner of OWN.

Thursday, 13 January 2011

SBS 2003 to SBS 2011 Microsoft Migration Document Download Now Available

The Microsoft method for migrating SBS 2003 to SBS 2011 is now available as a Word document download.

Our previous post pointing to the TechNet content:

Hat Tip: Susan Bradley 

Philip Elder
MPECS Inc.
Microsoft Small Business Specialists
Co-Author: SBS 2008 Blueprint Book

*Our original iMac was stolen (previous blog post). We now have a new MacBook Pro courtesy of Vlad Mazek, owner of OWN.

Windows Live Writer

Friday, 24 December 2010

SBS 2003 to SBS 2011 Microsoft Migration White Paper on TechNet

Microsoft’s migration story for SBS 2011 can be found at this landing page:

image

The first live link on the site is for the SBS 2003 to SBS 2011 migration process.

We have already run the migration steps once through when we migrated our own SBS 2003 R2 Premium domain to an early release of the SBS v7 bits. For the most part things were fairly straight forward relative to our SBS 2003 to SBS 2008 migration guide.

We will be releasing an updated version of the Migration Guide for this process too as Exchange 2010 introduces a few nuances in the process.

Philip Elder
MPECS Inc.
Microsoft Small Business Specialists
Co-Author: SBS 2008 Blueprint Book

*Our original iMac was stolen (previous blog post). We now have a new MacBook Pro courtesy of Vlad Mazek, owner of OWN.

Windows Live Writer

Tuesday, 12 October 2010

A Perfect Cup of Coffee Every Time

As mentioned in our Thanksgiving post we are pregnant with our fourth child. One of the adventures with each pregnancy has been the various cravings that Monique will have.

One of my favourite cravings was during our first pregnancy’s second trimester. We had Monique’s pancakes, whipped cream, maple syrup, and all of the fixings _every day_ for close to four months. I gained quite a few “sympathetic” pounds during that period! ;)

Lately, one of Monique’s cravings has been for a cup of coffee in the morning. Monique was normally a tea drinker up till then. Since we generally made coffee with a stove top percolator to “cook” the coffee grinds to our preferred strength, we needed a coffee maker that would make a decent single cup of coffee on short order.

We looked at a number of coffee makers that used a pre-packaged cup or disk with the coffee grounds in it. After evaluating the various machines we ended up purchasing a Cuisinart Keurig Single Server Brewing System (SS-700C) (Canadian product site).

image

We chose the Cuisinart model because it has the ability to use an included My K-Cup Reusable Coffee Filter which meant that we were not locked into purchasing the pre-packaged coffee cups. This feature was critical because we absolutely love Tim Hortons coffee with a close second for Starbuck’s Verona or Sumatra blends.

So, after working through the various water volumes (8oz, 10oz, and 12oz) and coffee grind scoops we have managed to come up with a near perfect cup of coffee every time:

  • Keurig Settings
    • Water Temp: 194 Degrees Fahrenheit
    • Default cup size: 8oz
  • Tim Hortons Fine Grind
    • 2.5 scoops of coffee.
    • 8oz water setting.
    • Add the required cream and sugar to taste (or black).
  • Starbucks Sumatra and Verona Espresso Grind (ultra-fine)
    • 2 scoops of coffee
    • 10oz water setting
    • Add the required cream and sugar to taste (or black).

When we purchased the bag of Starbuck’s coffee the Keurig was new so we did not know what grind level would be best. When it comes time to replace the Starbuck’s coffee will will step back the grind setting so that the grind is not so fine.

We only use osmotic water for our coffee.

IT Professionalism

So, what does brewing a perfect cup of coffee have to do with our own IT business?

Drinking a lot of coffee to figure out the needed coffee to water configuration brought us to the point where we could _document_ the required process to make that coffee _every time_ a cup of coffee was required. Thus, our “client”, Monique, was able to enjoy her morning coffee consistently.

Not only do we need to take the time to work out the best process for configuring our IT Solutions, but we also need to take the time to consult with our fellow IT professionals to see if there are ways that we can improve our IT processes and/or IT Solutions.

In the end, when it comes to implementing an IT Solution we must have the right documentation in place, checklists to guide us through the set up procedures, and key vendor representatives on-call to help us out if we get into a pinch.

These processes are an absolute must to providing our clients with a Professional long term trouble free IT Solution.

Philip Elder
MPECS Inc.
Microsoft Small Business Specialists
Co-Author: SBS 2008 Blueprint Book

*Our original iMac was stolen (previous blog post). We now have a new MacBook Pro courtesy of Vlad Mazek, owner of OWN.

Windows Live Writer

Friday, 25 June 2010

Some Office 2010 Resources

A trial copy of Office 2010 is available for download.

The Office 2010 user guides are a good source for learning the product’s various abilities.

We manage our client’s Microsoft Office deployments using Group Policy. To do so, we need to create and link a custom GPO and import the respective templates into that GPO.

Since there are now two architecture based versions of Office, one for x86 (32bit) and amd64/x64 (64bit), we need to be mindful of any caveats to running the newly created 64bit version.

And finally, Microsoft has simplified the number of versions of Office down to three.

Philip Elder
MPECS Inc.
Microsoft Small Business Specialists
Co-Author: SBS 2008 Blueprint Book

*Our original iMac was stolen (previous blog post). We now have a new MacBook Pro courtesy of Vlad Mazek, owner of OWN.

Windows Live Writer

Wednesday, 31 March 2010

Moving The AutoDesk Vault Out of SQL 2005 Express On Windows XP Pro And Into SQL 2008 Standard

We have been having a bit of an adventure taking a client’s maxed SQL 2005 Express based AutoDesk Vault 2008 database content into a full SQL 2008 Standard database structure and then tying it into AutoDesk Vault 2009 and AutoDesk DMS 2009.

Note that an overview of the actual steps to get things going happen at the bottom of the post. What follows is the ongoing odyssey that we have had trying to follow the various AutoDesk instructions and posts online that we pulled up for the various errors we encountered.

It is important to have the Advanced Configuration Guide at hand for this process. Note that the link below is a search for it since any links on the AutoDesk forums seem to be broken:

The SQL instance upgrade  process required is as follows:

  1. Install SQL 2008 Express and Upgrade the AutoDeskVault instance.
    • image
  2. Upgrade the SQL 2008 Express instance using the SQL 2008 Standard install routine in maintenance mode.
    • image
    • Note the version difference between the two screenshots.

Now, in this case the Vault and its respective database are running on top of Windows XP Professional. So, we end up with the following when running SQL 2008 Standard in maintenance mode to upgrade the instance:

image As a result, we took the safe route and did the following:

  1. Installed SQL 2008 Express x64 on the soon to be SQL 2008 Standard server
  2. Detached the databases from the workstation SQL 2008 Express AutoDeskVault instance
  3. Copied them over to the SQL 2008 server
  4. Install SQL 2008 Express Edition:
    1. image
    2. image 
    3. image
    4. image
    5. image
    6. image   
  5. Attach the AutoDesk Vault and other databases to SQL 2008 Express now installed on the server.
  6. Run the maintenance mode install routine from the SQL 2008 Standard DVD to upgrade the AutoDeskVault instance.
  7. Reset the SA password to the AutoDesk defaults just in case.

Make sure that if SQL 2005 Management Express is installed that it is removed before installing the SQL 2008 Management Express tools.

There are also some key steps that need to happen on the SQL 2008 Standard instance such as disabling the password security features and more.

As always, it is a good idea to make sure to read through the documentation carefully and then work them to the particular circumstances we happen to be in! ;)

***

This post has been sitting open since we started this whole process this yesterday!

It turns out that we were bitten by the SQL 2008 Standard _For Small Business_ bug. How is that?

Well, we went to do the Edition Upgrade via the SQL Server Installation Center:

image

We keyed in our product key and ran through _all_ of the steps until we hit a roadblock that said we were unable to install the current SQL edition on the OS we were installing it on.

That really took us for a loop as we had already gone through and installed this particular SQL 2008 Standard (now for Small Business) on its own with no problems.

So, we ended up detaching the Vault databases from the SQL 2008 Express that we had installed on the server (we were following the AutoDesk instructions to the letter), moving the databases into a safe place, uninstalling SQL 2008 Express, installing SQL 2008 Standard for Small Business, and reattaching the databases.

From there, we installed the AutoDesk Data Management Server. Note that disk swaps are a part of the install process!

Or so we thought …

image

There is some cleanup that needs to happen before we can move forward.

So, we deleted:

image

Click the Re-test button and:

image

When we checked the SQL DATA folder to make sure it was empty we found nothing, so the second part of the error must be the one.

And so it was:

image

Now, we are talking about _25GB_ of file storage here. So, we will rename the \ProgramData\Autodesk root folder to Autodesk – Old and retry.

image

TIP: We always label the OS partition after the server name, that is why the label in the above screenshot is greyed out. This gives us an at-a-glance “which server am I on?” look which comes in handy when managing large numbers of servers throughout the day.

We are now good to go:

image

And subsequently:

image

And, finally we are greeted with a successful ADMS 2009 install:

image

When we fired up the ADMS 2009 console we received:

image

Pre-existing Database(s) Detected 

Once the process completed we had a fresh ADMS 2009 install using fresh databases.

To get the Vault data in, we needed to detach the fresh Vault and the fresh KnowledgeVaultMaster databases in ADMS.

First, the fresh Vault:

image

Vault “Vault” was successfully detached.

The view from within the SQL Management Studio for the AUTODESKVAULT instance:
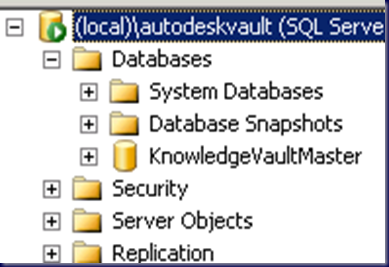
image

So, the ADMS detach actually removes the database from the instance.

From there:

image

Vault “KnowledgVaultMaster” was successfully detached.

And again from within the SQL Management Studio:

image

So, before we go and attach the original databases, we moved the needed databases into the SQL DATA folder, and then the VaultServer\FileStore content into the new location.

Once the FileStore move has completed, we go to Attach Master Vault _in_ ADMS:

image

And the actual database and log files before being attached in Windows Explorer:

image

In ADMS we receive an error:image

Error

Cannot attach database ‘KnowledgeVaultMaster’ since it is of the wrong database type.

Ouch. So, off to the SQL Management Studio we go to attach the database manually.

After manually attaching the Db via SQL Management Studio and reopening ADMS 2009 we received:

image

Your Vault Master database appears to be out of date. You need to migrate before continuing. Would you like to migrate now? Choosing ‘No’ will exit the server console.

Okay, so we need to figure out how to get the setup to recognize that the server name has been changed!

We ended up with another error!

image

Error

If server ‘<servername>’ is intended to be a member of a replicated environment, please install Autodesk Productstream Replicator. If this computer has been recently renamed, please update the site via the server console command line options.

The command line was a bit of a task to find since we could not get into the ADMS 2009 console on our SQL server and our virtualized ADMS 2008 PC we are using as a reference does not bring anything relevant up in the help topics?!?

Here we find the proper syntax:

  We ran the command line to get things going and it did not work:

image

Autodesk Data Management Server Console 2009

The database must be the same version as this Autodesk data management server, but the migration process failed to update the database to the same level as the server.

This indicates a serious problem with your server installation – the server console will now exit.

So, after all of this, here we sit with nothing in hand but an installed instance of SQL 2008 Standard for Small Business named AUTODESKVAULT, and an ADMS 2009 console that refuses to work with any database and Vault File Content configuration we throw at it.

It _will_ open if no databases are attached to the AUTODESEKVAULT instance though. And, therein lies the clue to what we needed to do.

The Solution

While all of this was going on, we were able to finally clean up the original machine running as a VM on one of our Hyper-V servers here in the shop to get a successful ADMS backup! This, after updating the VM’s SQL 2005 Express with SQL 2008 Express too.

So, we transported that backup back to the client and ran the restore into ADMS 2009. We needed to make sure that the SQL DATA directory was empty as well as the FileStore location before running the restore.

After two to three hours we received:

image

Autodesk Data Management Server Console 2009

The restore operation has been successfully finished.

Wow! We were finally somewhere close to bringing this setup back online!

And we did . . . finally!

An overview of the path from start to an actual finish for the process we needed to use:

  1. ShadowProtect backup the workstation AI and ADMS are installed on.
  2. Restore that SP image to VM.
  3. Run ADMS backup to USB or network location.
  4. Install SQL 2008 Express and upgrade the AUTODESKVAULT instance to SQL 2008.
  5. Run ADMS backup to USB or network location
    • Yes, we will have two backups! One before being touched and one after.
  6. Install standalone server OS and update.
  7. Install SQL 2008 Standard for Small Business AUTODESKVAULT instance.
    1. Install in Windows/SQL Authentication Mixed Mode
    2. Set the SA password to the required AutoDesk default.
  8. Install the latest SQL 2008 service pack and updates.
  9. Install ADMS 2009 (2010 may work the same way).
    1. It will discover the SQL instance and use it.
  10. In ADMS detach the new Vault.
  11. In ADMS detach the new KnowledgeVaultMaster.
  12. In ADMS, right click on the root folder and click on Restore.
  13. Navigate to the backup folder created earlier and choose it.
    • image
  14. Once complete, a message will indicate that the restore was either successful or had failed.
    1. If successful, the needed databases will now be found in the SQL DATA folder on the server and in SQL Management Studio Express.
    2. Database user permissions will be restructured according to the new server setup.
  15. Update the AutoDesk products on the workstations.
  16. Once complete, open the Vault Explorer on the workstation.
  17. Set the logon to Auto Logon.
  18. Right click on the root folder in the Vault and Get Entire Folder.
    • image
  19. Done.

The most significant roadblock we ran into in this process had to do with the break in following the AutoDesk instructions to the letter. Because of the SQL version we had, which any SBS 2008 Premium site will have BTW, we were unable to complete the Edition Upgrade step.

This is one place where running the scenario virtually first would have saved us a lot of time when it came time to run the changes on the production network.

Philip Elder
MPECS Inc.
Microsoft Small Business Specialists
Co-Author: SBS 2008 Blueprint Book

*Our original iMac was stolen (previous blog post). We now have a new MacBook Pro courtesy of Vlad Mazek, owner of OWN.

Windows Live Writer

Saturday, 9 January 2010

Intel Modular Server – CMM Firmware Update To v5.5 Just Released

It seems that v5.0, which was released in mid October, is being updated as of yesterday January 8, 2010.

Version 5.5 of the Intel Modular Server firmware has been released.

Now, if the above link does not work as it does of this writing, then go to the Intel Download Finder site and punch in MFSYS25 to gain access to the latest updates for the IMS.

One of the changes contained within v5.5 is MFS5520VI compute module compatibility for the Intel Westmere 32nm CPU (PDF link).

From the PDF:

image

The CMM version must be v5.5 before inserting an MFS5520VI compute module into the chassis.

Since we already have two Storage Control Modules (SCM) installed, we need not be concerned with the caveats to installing this update.

We will run this update after everything has been flattened in anticipation of our second test run.

For those running, or planning to run, RedHat Enterprise Linux, note the following from the Release Notes (TXT file link):

RedHat* Enterprise Linux 5 Update 4 Dual SCM Support – This release provides support for dual SCM configurations running the RedHat* Enterprise Linux 5 Update 4 operating system. A clean installation of the RedHat* Enterprise Linux 5 Update 4 operating system is required to support dual SCM configurations.

Note the need for an OS reinstall in order to pick up the ability to utilize both Storage Control Modules in RedHat Enterprise Linux.

Intel Download site Tip:

When the search results come up, change the sorting order from Relevance to Date:

image

Sorting everything via date makes it easy to see what has changed since the last time we visited the site.

Philip Elder
MPECS Inc.
Microsoft Small Business Specialists
Co-Author: SBS 2008 Blueprint Book

*Our original iMac was stolen (previous blog post). We now have a new MacBook Pro courtesy of Vlad Mazek, owner of OWN.

Windows Live Writer

Friday, 7 August 2009

HP TouchSmart iQ800 Series Desktop PC – Wall Mounting

We are outfitting one of our client business owner’s home with equipment that will tie into the home automation equipment supplied by 360 Theatre Systems based out of Edmonton.

One of the products that we are supplying is the HP TouchSmart iQ800 series desktop PC.

One of the PCs will be wall mounted at a desk near the laundry room that has limited desktop space.

HP has an excellent instruction set that includes a video for getting the custom VESA bracket mounted to the PC:

image

The process is actually quite in-depth requiring us to remove the back panel, third leg, and the front two peg legs before mounting the base bracket under the back cover.

The install on-site for the units will not be until early next month. So, we will be testing one of them with Windows 7 Ultimate RTM to see how the new OS integrates with the PC’s features as well as how the OS will interact with HP’s drivers .

Philip Elder
MPECS Inc.
Microsoft Small Business Specialists
Co-Author: SBS 2008 Blueprint Book

*All Mac on SBS posts will not be written on a Mac until we replace our now missing iMac! (previous blog post)

Windows Live Writer

Wednesday, 27 May 2009

The Intel ARK Information Site Is Excellent

This is a site that came up while searching for relevant information on the new Atom processor revisions:

image

The site:

This is a pretty neat grid of all of Intel’s product code names:

image

Click through from the home page to the Atom processor family page which is what we were searching for in the first place:

image

A grid of all of the available Atom processors showing product features at a glance and a link to the actual product micro-site.

The specific Atom Processor 330 product micro-site:

image

This is one site that definitely needs to be bookmarked as it contains a wealth of product information that is generally two or three clicks away from the home page!

Also, make sure to check out the Product Tools links near the top right of the Home Page. The Platform Browser and the System Design Tool are phenomenal multiple choice decision making tools.

Philip Elder
MPECS Inc.
Microsoft Small Business Specialists
Co-Author: SBS 2008 Blueprint Book

*All Mac on SBS posts will not be written on a Mac until we replace our now missing iMac! (previous blog post)

Windows Live Writer

Tuesday, 26 August 2008

TechNet Plus: SQL 2008 RTM bits available for download

A little behind the gun on this one:


TechNet Plus: SQL 2008 Downloads

With our being on the SBS 2008 beta, a couple of test runs at installing the product were done in the blind ... meaning no reads.

Needless to say, we did not get very far. :)

Things have changed a bit on the install and configuration front between SQL 2005 and SQL 2008. Time to do some reading.

Some related links:

That last one could be very important for us SBSers in relation to SBS 2008 Premium Edition with SQL 2008 included.

Philip Elder
MPECS Inc.
Microsoft Small Business Specialists

*All Mac on SBS posts are posted on our in-house iMac via the Safari Web browser.

Tuesday, 29 April 2008

Server Core - Move that Swap/Page File - WMI Error Code = 0x80041017

UPDATED 2012-01-17: MPECS Inc. Blog: Server Core–How to Properly Move the Swap File

This one was a really tough find ...

From the Microsoft TechNet Server 2008 Core online documentation on managing Server Core we get (square brackets because Blogger can't seem to interpret greater than or less than symbols properly):

Disable paging file management: At a command prompt, type:

wmic computersystem where name="[computername]" set AutomaticManagedPagefile=False
So, in our Core command line we type on one line (ignore text wrapping):

wmic computersystem where name="MyCoreServerName" set AutomaticManagedPagefile=False
WMI tells us that the command was successful.

On to step 2:

Configure the paging file: At a command prompt, type:

wmic pagefileset where name=”[path/filename]” set InitialSize=[initialsize],MaximumSize=[maxsize]

Where:

path/filename is the path to and name of the paging file
initialsize is the starting size of the paging file in bytes.
maxsize is the maximum size of the page file in bytes.
Okay, no matter how we interpret the above command, we cannot get a success message from WMI.

The errors we were getting the following two errors consistently:

  • No Instances Available
  • Error Code = 0x80041017
    Description = Invalid query
    Facility = WMI
Any amount of searching either turned up a regurgitation of the TechNet article, or out of date instructions that did nothing to help us.

After a number of different searches using a number of different search engines, we finally stumbled on the following on the Server Core blog: Tips and Tricks Vol. 4:

  1. wmic computersystem where name=”[computername]” set AutomaticManagedPagefile=False
  2. wmic pagefileset where name=”C:\\pagefile.sys” set InitialSize=500,MaximumSize=1000
How refreshing. :) The second command worked for establishing an 8-16GB page file on the S: partition and it verifies after the reboot.

We are fortunate that we have blogs to turn to in this day and age. Here is a good example where the documentation for a product is not so good, but the product team's blog documentation is very good.

This is not the first time we have run into poor product documentation for a new Microsoft product. It probably will not be the last. This is truly unfortunate because we then need to waste a bunch of time searching out the answer to something that should be right in front of us in the first place. :(

UPDATE 2008-06-25: For clarification on the above: Assuming that we have created a partition with the S: label:
  1. wmic computersystem where name=”MyCoreServer” set AutomaticManagedPagefile=False
  2. wmic pagefileset where name=”S:\\pagefile.sys” set InitialSize=2500,MaximumSize=10240
The above commands will disable the system managed pagefile and create a new one using the sizes indicated on the S: partition. Note the lack of spaces between the Intial and Maximum size settings.

Also note, if the command continues to fail, reboot after disabling the automatic pagefile management and run the command again. We are finding that the command does not always run successfully after disabling the automatic management.

Philip Elder
MPECS Inc.
Microsoft Small Business Specialists

*All Mac on SBS posts are posted on our in-house iMac via the Safari Web browser.