Showing posts with label SBS 2008 Premium. Show all posts

Tuesday, 23 April 2013

Move the Symantec SEM5.db file to another partition

We have an SBS 2008 Standard setup that’s getting really tight on the system drive.

We’ve pretty much moved everything and anything we can off of the system partition to keep space as free as possible.

One of the last pieces to be moved is the SEM5.db file that runs around 2GB or more.

To move that file we followed these instructions:

  1. Go to services.msc
  2. Stop the Symantec Endpoint Protection Manager Service
  3. Stop the Symantec Embedded Database Service
  4. Go to \Program Files\Symantec\Symantec Endpoint Protection Manager\db and cut the sem5.db file and paste it to the new drive
  5. Click Start
  6. Click run
  7. Type regedit
  8. Go to HKey_Local_Machine\system\CurrentControlSet\Services\ASANYs\Parameters\ click on the Parameters option in the right hand side column and change the path of the sem5.db database file to the new location as New Drive:\Folder name
    • Our folder: image
  9. Restart the Symantec Embedded Database Service from services.msc
    • NOTE: We were able to log on to the SEP Management Console once we had both services started at this point.
  10. Go to Administrative Tools
  11. Click on Data Sources (ODBC)
  12. Click on System DSN tab
  13. Click on Configure button
  14. Highlight the database tab and replace the path for the sem5.db file and ensure connectivity by clicking on Test Connection
  15. Go to Management Server configuration Wizard and perform the server reconfiguration

That freed up over 2GB of storage space which at this point for this particular SBS is _a lot_ of space to be had! :)

Philip Elder
MPECS Inc.
Microsoft Small Business Specialists
Co-Author: SBS 2008 Blueprint Book

Chef de partie in the SMBKitchen
Find out more at
www.thirdtier.net/enterprise-solutions-for-small-business/

Windows Live Writer

Monday, 13 December 2010

Office 2007 Error – OutOfBoundsIndex And Office64WW.xml

We are trying to get Office 2007 installed on that standalone server that we installed BESx on (BlackBerry label) a little while back.

image

Microsoft Office Professional Plus 2007 Setup has stopped working.

An error occurred during the installation, and Microsoft Office Professional Plus 2007 setup was unable to complete.

. . . OutOfBoundsIndex
ProPlus.WW\Office64WW.xml

The Check online button does nothing to bring up any possibilities for a fix.

In the Remote Desktop Services server’s event logs we found:

Log Name:      Application
Source:        Microsoft Office 12
Date:          12/13/2010 10:55:32 AM
Event ID:      5000
Task Category: None
Level:         Information
Keywords:      Classic
User:          N/A
Computer:      TS-01.domain.local
Description:
The description for Event ID 5000 from source Microsoft Office 12 cannot be found. Either the component that raises this event is not installed on your local computer or the installation is corrupted. You can install or repair the component on the local computer.

If the event originated on another computer, the display information had to be saved with the event.

The following information was included with the event:

Office12Setup
{10120000-0F00-0000-0000--0000000FF1CE}
12.0.4518.1014
X
OutOfBoundsIndex
ProPlus.WW\Office64WW.xml

Searching for OutOfBoundsIndex (Bing search) brings up a lot of links to the _same_ forum support request on other forums which does not include an option.

After sifting through the above search results we came upon this forum post:

That post lead us to this one:

In this post we found the answer to our install problem.

Since this particular server had Office 2007 installed and running in Remote Desktop Services (Terminal Services) prior to the BlackBerry Enterprise Express install, we had uninstalled it prior to running the BESx install routine.

Once BESx and the extra Microsoft components had been installed a block was set into the registry to not allow Outlook to be installed on the same machine.

image

BlockOutlook12: 1

Well, we need Office for Word and Excel without Outlook.

So, we edited the registry as follows:

image

BlockOutlook12: 0

We reran Office setup and it again failed.

So, we went ahead and renamed the registry keys mentioned:

image

However, the key did not exist in the second location:

image

We then ran the Office setup and were greeted with:

image

So, we entered our key and set the following for Installation Options:

image

After clicking the Install Now:

image

And finally:

image

We then ran Word and Excel to make sure they fired up as expected:

image

The final step was to verify that they were being properly served by TS RemoteApps:

image

And:

image

Good to go!

We now know how to get RDS/TS and Office back onto a standalone server running BlackBerry Enterprise Server Express.

Philip Elder
MPECS Inc.
Microsoft Small Business Specialists
Co-Author: SBS 2008 Blueprint Book

*Our original iMac was stolen (previous blog post). We now have a new MacBook Pro courtesy of Vlad Mazek, owner of OWN.

Windows Live Writer

Wednesday, 20 October 2010

TS RemoteApps – Disable Printer Redirection For Branch Offices

In most cases branch offices will have a site to site hardware based VPN. In some cases where the branch office is large enough there may be a local DC or RODC installed there.

In either case we are probably joining the remote PCs to the SBS 2008 domain so that we can manage them, their updates, their mapped drive letters, and more.

So, when the remote users are connecting to their needed application via TS RemoteApps they will not need to have printer redirection enabled. If they do, then they may end up with multiple copies of the local printer being served by the TS session thus causing confusion.

So, to eliminate any possibility of confusion for the user we edit the TS RemoteApp’s RDP file that we created to disable printer redirection.

  1. Create the RDP file in TS RemoteApps manager.
  2. Edit the RDP file by doing the following:
    1. Right click on the file and left click on Open With.
      • image
    2. Uncheck Always use the selected …
    3. Click the Browse button.
    4. Navigate to %windir%.
    5. Vista/Win7: Type Notepad in the Search Windows field
      • image
    6. Double click on Notepad.exe found in C:\Windows
      • image
    7. Make sure Notepad is highlighted and click OK.
      • image
      • Again, make sure that Always use the selected program … is not checked.
    8. Change the following setting from “1” to “0”:
      • OLD Setting: redirectprinters:i:1
      • NEW Setting: redirectprinters:i:0
      • image
    9. Save the file by clicking File –> Save.
    10. Close Notepad.
    11. Distribute the RDP file.

Once the above process has been done once, the Open with menu will show Notepad as an option:

image

We now have a RemoteApps session that will no longer show the Printer Name (Redirected) as their default printer along with (Redirected) copies all of the other standard Group Policy deployed printers that would be on their SBS 2008 domain.

Philip Elder
MPECS Inc.
Microsoft Small Business Specialists
Co-Author: SBS 2008 Blueprint Book

*Our original iMac was stolen (previous blog post). We now have a new MacBook Pro courtesy of Vlad Mazek, owner of OWN.

Windows Live Writer

Thursday, 12 August 2010

SQL Server Install Error: Rule “Restart Computer” failed.

So, we get this error when we go to install a new instance of SQL 2008 on a dedicated Windows Server 2008 Standard x64 box:

image

Rule Check Result

Rule “Restart computer” failed.

A computer restart is required. You must restart this computer before installing SQL Server.

But, we _just_ restarted it because of that error?!?

A quick search turned up the following:

The Forum post suggest that we look at the following registry key:

  • HKEY_LOCAL_MACHINE\SYSTEM\CurrentControlSet\Control\Session Manager\PendingFileRenameOperations

Sure enough, when we look into the registry, we find the culprit:

image

We deleted the content in that key since whatever the HP driver was trying to do it was failing at it miserably.

image

Of course, we Exported the Session Manager key _before_ deleting the content!

When we click the Re-run button in the SQL Server 2008 Setup window we were greeted with:

image

Restart Computer: Passed

We were good to go on installing that needed instance.

Philip Elder
MPECS Inc.
Microsoft Small Business Specialists
Co-Author: SBS 2008 Blueprint Book

*Our original iMac was stolen (previous blog post). We now have a new MacBook Pro courtesy of Vlad Mazek, owner of OWN.

Windows Live Writer

Thursday, 29 April 2010

On a Deployment

We have been on-site since last Friday deploying three new servers.

  • Small Business Server 2008
  • Windows Server 2008 x64
    • Two instances of Microsoft SQL Standard for Small Business x64
  • Windows Server 2008 R2
    • Terminal Services serving RemoteApps via the Remote Web Workplace

This particular solution replaced the existing SBS 2003 and Windows Server 2003 TS box.

We did not migrate because the source domain was too messed up.

Posting will probably remain light for the rest of the week and into next due to the volume of client work that we are dealing with both with this deployment and other client needs.

Philip Elder
MPECS Inc.
Microsoft Small Business Specialists
Co-Author: SBS 2008 Blueprint Book

*Our original iMac was stolen (previous blog post). We now have a new MacBook Pro courtesy of Vlad Mazek, owner of OWN.

Windows Live Writer

Wednesday, 31 March 2010

Moving The AutoDesk Vault Out of SQL 2005 Express On Windows XP Pro And Into SQL 2008 Standard

We have been having a bit of an adventure taking a client’s maxed SQL 2005 Express based AutoDesk Vault 2008 database content into a full SQL 2008 Standard database structure and then tying it into AutoDesk Vault 2009 and AutoDesk DMS 2009.

Note that an overview of the actual steps to get things going happen at the bottom of the post. What follows is the ongoing odyssey that we have had trying to follow the various AutoDesk instructions and posts online that we pulled up for the various errors we encountered.

It is important to have the Advanced Configuration Guide at hand for this process. Note that the link below is a search for it since any links on the AutoDesk forums seem to be broken:

The SQL instance upgrade  process required is as follows:

  1. Install SQL 2008 Express and Upgrade the AutoDeskVault instance.
    • image
  2. Upgrade the SQL 2008 Express instance using the SQL 2008 Standard install routine in maintenance mode.
    • image
    • Note the version difference between the two screenshots.

Now, in this case the Vault and its respective database are running on top of Windows XP Professional. So, we end up with the following when running SQL 2008 Standard in maintenance mode to upgrade the instance:

image As a result, we took the safe route and did the following:

  1. Installed SQL 2008 Express x64 on the soon to be SQL 2008 Standard server
  2. Detached the databases from the workstation SQL 2008 Express AutoDeskVault instance
  3. Copied them over to the SQL 2008 server
  4. Install SQL 2008 Express Edition:
    1. image
    2. image 
    3. image
    4. image
    5. image
    6. image   
  5. Attach the AutoDesk Vault and other databases to SQL 2008 Express now installed on the server.
  6. Run the maintenance mode install routine from the SQL 2008 Standard DVD to upgrade the AutoDeskVault instance.
  7. Reset the SA password to the AutoDesk defaults just in case.

Make sure that if SQL 2005 Management Express is installed that it is removed before installing the SQL 2008 Management Express tools.

There are also some key steps that need to happen on the SQL 2008 Standard instance such as disabling the password security features and more.

As always, it is a good idea to make sure to read through the documentation carefully and then work them to the particular circumstances we happen to be in! ;)

***

This post has been sitting open since we started this whole process this yesterday!

It turns out that we were bitten by the SQL 2008 Standard _For Small Business_ bug. How is that?

Well, we went to do the Edition Upgrade via the SQL Server Installation Center:

image

We keyed in our product key and ran through _all_ of the steps until we hit a roadblock that said we were unable to install the current SQL edition on the OS we were installing it on.

That really took us for a loop as we had already gone through and installed this particular SQL 2008 Standard (now for Small Business) on its own with no problems.

So, we ended up detaching the Vault databases from the SQL 2008 Express that we had installed on the server (we were following the AutoDesk instructions to the letter), moving the databases into a safe place, uninstalling SQL 2008 Express, installing SQL 2008 Standard for Small Business, and reattaching the databases.

From there, we installed the AutoDesk Data Management Server. Note that disk swaps are a part of the install process!

Or so we thought …

image

There is some cleanup that needs to happen before we can move forward.

So, we deleted:

image

Click the Re-test button and:

image

When we checked the SQL DATA folder to make sure it was empty we found nothing, so the second part of the error must be the one.

And so it was:

image

Now, we are talking about _25GB_ of file storage here. So, we will rename the \ProgramData\Autodesk root folder to Autodesk – Old and retry.

image

TIP: We always label the OS partition after the server name, that is why the label in the above screenshot is greyed out. This gives us an at-a-glance “which server am I on?” look which comes in handy when managing large numbers of servers throughout the day.

We are now good to go:

image

And subsequently:

image

And, finally we are greeted with a successful ADMS 2009 install:

image

When we fired up the ADMS 2009 console we received:

image

Pre-existing Database(s) Detected 

Once the process completed we had a fresh ADMS 2009 install using fresh databases.

To get the Vault data in, we needed to detach the fresh Vault and the fresh KnowledgeVaultMaster databases in ADMS.

First, the fresh Vault:

image

Vault “Vault” was successfully detached.

The view from within the SQL Management Studio for the AUTODESKVAULT instance:
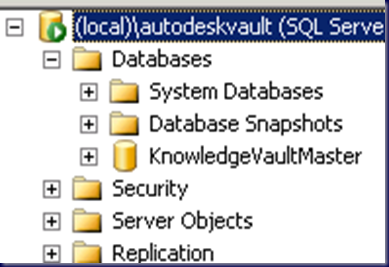
image

So, the ADMS detach actually removes the database from the instance.

From there:

image

Vault “KnowledgVaultMaster” was successfully detached.

And again from within the SQL Management Studio:

image

So, before we go and attach the original databases, we moved the needed databases into the SQL DATA folder, and then the VaultServer\FileStore content into the new location.

Once the FileStore move has completed, we go to Attach Master Vault _in_ ADMS:

image

And the actual database and log files before being attached in Windows Explorer:

image

In ADMS we receive an error:image

Error

Cannot attach database ‘KnowledgeVaultMaster’ since it is of the wrong database type.

Ouch. So, off to the SQL Management Studio we go to attach the database manually.

After manually attaching the Db via SQL Management Studio and reopening ADMS 2009 we received:

image

Your Vault Master database appears to be out of date. You need to migrate before continuing. Would you like to migrate now? Choosing ‘No’ will exit the server console.

Okay, so we need to figure out how to get the setup to recognize that the server name has been changed!

We ended up with another error!

image

Error

If server ‘<servername>’ is intended to be a member of a replicated environment, please install Autodesk Productstream Replicator. If this computer has been recently renamed, please update the site via the server console command line options.

The command line was a bit of a task to find since we could not get into the ADMS 2009 console on our SQL server and our virtualized ADMS 2008 PC we are using as a reference does not bring anything relevant up in the help topics?!?

Here we find the proper syntax:

  We ran the command line to get things going and it did not work:

image

Autodesk Data Management Server Console 2009

The database must be the same version as this Autodesk data management server, but the migration process failed to update the database to the same level as the server.

This indicates a serious problem with your server installation – the server console will now exit.

So, after all of this, here we sit with nothing in hand but an installed instance of SQL 2008 Standard for Small Business named AUTODESKVAULT, and an ADMS 2009 console that refuses to work with any database and Vault File Content configuration we throw at it.

It _will_ open if no databases are attached to the AUTODESEKVAULT instance though. And, therein lies the clue to what we needed to do.

The Solution

While all of this was going on, we were able to finally clean up the original machine running as a VM on one of our Hyper-V servers here in the shop to get a successful ADMS backup! This, after updating the VM’s SQL 2005 Express with SQL 2008 Express too.

So, we transported that backup back to the client and ran the restore into ADMS 2009. We needed to make sure that the SQL DATA directory was empty as well as the FileStore location before running the restore.

After two to three hours we received:

image

Autodesk Data Management Server Console 2009

The restore operation has been successfully finished.

Wow! We were finally somewhere close to bringing this setup back online!

And we did . . . finally!

An overview of the path from start to an actual finish for the process we needed to use:

  1. ShadowProtect backup the workstation AI and ADMS are installed on.
  2. Restore that SP image to VM.
  3. Run ADMS backup to USB or network location.
  4. Install SQL 2008 Express and upgrade the AUTODESKVAULT instance to SQL 2008.
  5. Run ADMS backup to USB or network location
    • Yes, we will have two backups! One before being touched and one after.
  6. Install standalone server OS and update.
  7. Install SQL 2008 Standard for Small Business AUTODESKVAULT instance.
    1. Install in Windows/SQL Authentication Mixed Mode
    2. Set the SA password to the required AutoDesk default.
  8. Install the latest SQL 2008 service pack and updates.
  9. Install ADMS 2009 (2010 may work the same way).
    1. It will discover the SQL instance and use it.
  10. In ADMS detach the new Vault.
  11. In ADMS detach the new KnowledgeVaultMaster.
  12. In ADMS, right click on the root folder and click on Restore.
  13. Navigate to the backup folder created earlier and choose it.
    • image
  14. Once complete, a message will indicate that the restore was either successful or had failed.
    1. If successful, the needed databases will now be found in the SQL DATA folder on the server and in SQL Management Studio Express.
    2. Database user permissions will be restructured according to the new server setup.
  15. Update the AutoDesk products on the workstations.
  16. Once complete, open the Vault Explorer on the workstation.
  17. Set the logon to Auto Logon.
  18. Right click on the root folder in the Vault and Get Entire Folder.
    • image
  19. Done.

The most significant roadblock we ran into in this process had to do with the break in following the AutoDesk instructions to the letter. Because of the SQL version we had, which any SBS 2008 Premium site will have BTW, we were unable to complete the Edition Upgrade step.

This is one place where running the scenario virtually first would have saved us a lot of time when it came time to run the changes on the production network.

Philip Elder
MPECS Inc.
Microsoft Small Business Specialists
Co-Author: SBS 2008 Blueprint Book

*Our original iMac was stolen (previous blog post). We now have a new MacBook Pro courtesy of Vlad Mazek, owner of OWN.

Windows Live Writer