[REDACTED]
Somehow I managed to split things up. The newest edition of the guide is here:
[REDACTED]
Somehow I managed to split things up. The newest edition of the guide is here:


We are setting up a couple of retail Windows XP Professional SP3 VMs. Once the base OS install was complete and the Hyper-V Integration Services were installed we allowed XP to cache updates.
The first round of updates state 100 available:
We allowed all updates but four:
Included in that first round was IE8:
We removed the Download and Install Updates check mark to just install IE8 since we are looking for the next round’s true update requirement.
Round 2 wanted two of the four dropped updates:
From there we received notification for one:
We then went to Microsoft’s Update site and updated to Microsoft Update.
Once we went through the Genuine Advantage Tool install we were able to choose from the remaining updates:
We had thought that we were done updating after the above Microsoft Update process but Windows Automatic Update chose to toss more our way after that.
Start to finish the update process for the freshly installed Windows XP Professional SP3 took a little over an hour and a half.
Note that the XP Pro base image used to install the OS was a trial version so the OS image was quite dated.
Philip Elder
MPECS Inc.
Microsoft Small Business Specialists
Co-Author: SBS 2008 Blueprint Book
*Our original iMac was stolen (previous blog post). We now have a new MacBook Pro courtesy of Vlad Mazek, owner of OWN.
A while back we posted instructions on how to reset Hyper-V’s virtual networking if something choked so as to not have to remove and reinstall the Hyper-V Role.
We are setting up a test box with the Hyper-V Role installed for a client that needs to demonstrate to the powers that be that virtualizing desktops running an LoB Terminal client is going to be the best option for them going forward.
When we went to set up the Hyper-V Role but it choked on setting up the vSwitch due to the Intel PROSet team being set to ALB instead of VMLB.
We could not get things to work after that so we went and ran the following commands in an elevated command prompt:
The result for the reinstall command failed though:
C:\>netcfg -l c:\windows\winsxs\amd64_wvms_pp.inf_31bf3856ad364e35_6.1.7600.1638
5_none_beda85050b13680c\wvms_pp.inf -c p -i vms_pp
Trying to install vms_pp .....failed. Error code: 0x80070002.
The command failed with error code 0x80070002. A search for this code brings up a lot of different results. But, it looks as though Microsoft KB201318 indicates that it is a “File Not Found” error.
Now, the original post was written for Windows Server 2008 R2 RTM. We are working with Windows Server 2008 R2 SP1, so the first thing to check is whether the folder referenced in the install command above even exists.
It does not.
So, looking at what we do have we now need to figure out _which_ of the two indicated folders that share the common prefix is the right one.
Here is a screenshot of the same search from a Win2K8 R2 RTM:
There is definitely a significant difference between the freshly installed R2 SP1 and the R2 RTM:
So, what are we to do? One would think that we would find the .INF file in the folder with the highest version number. But, this did not turn out to be the case:
The higher version numbers, 6.1.6701.17617 and above, only had the vmsntfy.dll file in them.
The right folder turned out to be 6.1.7601.17514:
Sure enough:
Our Hyper-V networking was now reinstalled and now cooperating or so we thought:
Virtual Network Manager
Setup switch failed.
The operation failed because the file was not found.
Well, since we just ground zeroed Hyper-V networking the last thing to do was to reboot the box.
Once back up and in we then tried to create an externally connected vSwitch and saw the following result:
We had our production network access for the VMs that will be running on this test box.
The correct sequence for resetting the Win2K8 R2 SP1 Hyper-V networking structures are:
Philip Elder
MPECS Inc.
Microsoft Small Business Specialists
Co-Author: SBS 2008 Blueprint Book
*Our original iMac was stolen (previous blog post). We now have a new MacBook Pro courtesy of Vlad Mazek, owner of OWN.
Original posted to the SBS2K Yahoo Group. This list has been tweaked and updated a bit. :)
A quick overview of how to set up Remote Desktop Services and RD RemoteApps on an SBS network:
When users connect to RDS or RemoteApp they will get a certificate warning. Coach them to tick the "Don't bug me again" box near the bottom left of the window.
Done.
Philip Elder
MPECS Inc.
Microsoft Small Business Specialists
Co-Author: SBS 2008 Blueprint Book
*Our original iMac was stolen (previous blog post). We now have a new MacBook Pro courtesy of Vlad Mazek, owner of OWN.
A paraphrase of a post to the SBS2K Yahoo Group.
In our opinion a server should _never_ be deployed without iDRAC Enterprise, iLO Advanced, Intel RMM, or other out-of-band (OOB) device. Period.
Professional grade tools for professionals.
We get:
What this does for us:
When patching or working on servers we create two connections to the box. One via RD Gateway and one via OOB. It is our preference to have physical access to that box at all times.
With the lack of a speaker on the Dell PERC RAID controllers and Open Manage may or may not e-mailing us about a failed drive we prefer to watch all reboot cycles for any anomalies.
If there is a failure, we can recover that server without any client intervention after the tier 1 tech has done their stuff.
I am sorry, but there is something totally unprofessional about, "I am sorry Mr. Customer, but could you sit at the server and see why I am locked out?" Or having to call a client’s user or contact in before or after business hours to find out why something broke. As IT Professionals we need to set the bar higher than that.
With gas at $1.10/Litre (US Gal = 3.78L, IMP Gal = 4.54L) here and rising at this time _not_ having to travel to client sites for out of scope work is a great thing.
Why?
Because they then _do_ see us when we are there for _positive_ things like rotating their backups or our bi-weekly "how are things?" visit (billable as soon as they say, "Can you fix this?" :*) ).
This aspect more than reinforces our _good_ presence in their business. Thus it strengthens our business relationship with our client contact and their users as we are seen and heard when things are good.
Philip Elder
MPECS Inc.
Microsoft Small Business Specialists
Co-Author: SBS 2008 Blueprint Book
*Our original iMac was stolen (previous blog post). We now have a new MacBook Pro courtesy of Vlad Mazek, owner of OWN.
The link came via the SBS2K Yahoo List.
Chris Puckett of Microsoft provides an excellent big picture view of how one would go about removing SBS from the picture once a client has grown past the 75 user/device limit.
The post by Chris:
SBS 2011 Standard still has a 75 user limit, so if you're already approaching 75 it might make more sense to go to Windows Server. You can migrate away from SBS 2008 by adding new server(s) running Windows Server 2008 R2 as domain controllers to the domain. Then add Exchange Server 2007/2010 server to migrate your mail to and a Sharepoint Server for that data.
There is no single document for this scenario, but you can treat SBS 2008 as Windows 2008 DC and Exchange/IIS server. The steps would not be much different. The only caveat is once you move the FSMO roles you have 21 days to complete the rest of the migration process and you would have to take care of licensing requirements
A basic outline would be
- ADprep SBS 2008 with the 08 R2 schema.
- Join WS08R2 DC as a secondary domain controller in the SBS 2008 Domain
- Install Exchange 2k7/2k10 on same server or different server.
- Move mailboxes/public folders, address book generation etc to the new server.. (there should be a guide on migrating exchange 2007 to 2010 on technet)
- Migrate any IIS websites they wish to keep
- Migrate any data they wish to keep to the new server (Sharepoint)
- If folder redirection/roaming profiles configured move that stuff over to the new server by updating the user account/group policy settings.
- Move FSMO roles and GC to WS08R2 (Might want to wait a few days to make sure everything is remaining operational as you have 21 days from this point).
- Uninstall Exchange 2007 from SBS 2008
- DCPromo down SBS 2008
- Remove the SBS 2008 server from the network
We have not run into this situation with any of our clients yet, but there are a few that are growing at a rate that may place them in this situation in the next year or two.
The above gives us an idea of how to go about keeping the core SBS features, but there are a few others that need to be considered when transitioning away from SBS:
Philip Elder
MPECS Inc.
Microsoft Small Business Specialists
Co-Author: SBS 2008 Blueprint Book
*Our original iMac was stolen (previous blog post). We now have a new MacBook Pro courtesy of Vlad Mazek, owner of OWN.
Rhetorical Questions:
If we are compromised in any way and any of the above holds true, our business could be dead in the water.
We have made many mistakes over the years, some very much in line with the above. As we have grown to understand the implications of our responsibility for our client’s data and its security we have taken many steps to tighten things up on our end.
Fellow MVP Dana Epp of Scorpion Software has started a series called Beyond The Data to help us understand the scope of our information security related responsibilities.
Since we wear many hats for our SMB/SBS clients, we need to be conscious of all of the attack vectors against our clients _including our own businesses holding their domain admin usernames and passwords_.
Watching Dana’s videos will be one very informative way on broadening our knowledge and experience and thus help us to tighten up our own security practices:
Philip Elder
MPECS Inc.
Microsoft Small Business Specialists
Co-Author: SBS 2008 Blueprint Book
*Our original iMac was stolen (previous blog post). We now have a new MacBook Pro courtesy of Vlad Mazek, owner of OWN.
Robert Crane has a couple of great how-to posts, one with video, on installing SharePoint Foundation Service Pack 1.
Robert has a specific How-To video here:
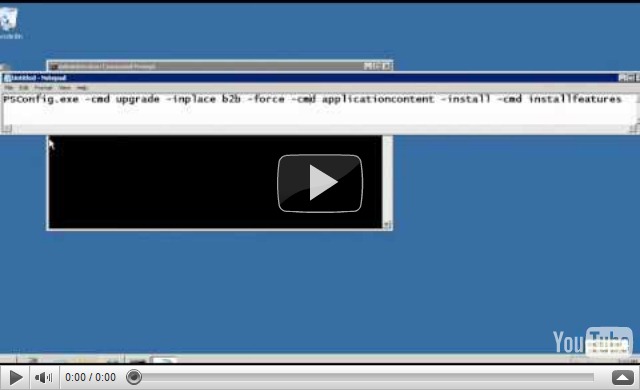
It seems that the PSConfig command needs to be run after any SharePoint Foundation service pack unlike previous generation SharePoint updates that ran the command as part of the process.
Philip Elder
MPECS Inc.
Microsoft Small Business Specialists
Co-Author: SBS 2008 Blueprint Book
*Our original iMac was stolen (previous blog post). We now have a new MacBook Pro courtesy of Vlad Mazek, owner of OWN.
We were in the final stages of the SBS 2003 to SBS 2011 migration when the Exchange 2003 setup routine failed to complete.
The very last line in the “Exchange Server Setup Progress.log” file found in C:\ was:
[17:08:51] Deleting the public store
When we looked in the Exchange System Manager we saw the following on the source server:
Nothing. No routing connectors, no Public Folders, no databases, nothing at all.
We were not able to run the uninstall process again.
So, to see if we were even remotely close to having our source server’s Exchange 2003 uninstalled we ran the Exchange 2010 BPA on the destination server leaving out the source server and admin group in the scan:
The only flag that came up was the following:
Write DACL inherit (group)
The Write DACL inherit (group) right for the Exchange Enterprise Servers group should be removed from the root of the domain.
The Tell Me More link takes us to:
It is indicated that we need to run a PowerShell script:
Now, deciphering how the above command was actually supposed to be entered was another story.
After a number of different searches we came up with the right combination of keywords that brought us here:
Thanks to LuccianoDuckman we have:
The proper syntax for the command:
When we punched the above into the Exchange Admin PowerShell console we saw the following:
[PS] C:\Windows\system32>Remove-ADPermission "dc=DOMAIN,dc=Local" -user "DOMAIN.Local\Exchange Enterprise Servers" -AccessRights WriteDACL -InheritedObjectType Group
Confirm
Are you sure you want to perform this action?
Removing Active Directory permission "DOMAIN.Local" for user "DOMAIN.Local\Exchange Enterprise Servers" with access rights "'WriteDacl'".
[Y] Yes [A] Yes to All [N] No [L] No to All [?] Help (default is "Y"): A
[PS] C:\Windows\system32>
We then re-ran the Exchange 2010 BPA to make sure that there were no other lingering issues and it came up clean.
We were good to remove the last remnants of Exchange 2003 from the source server. Note that the ESM on the source no longer functioned so we were not able to delete the source object there.

In the end, the choke may have been caused by two e-mails destined for the Public Folder store on the source server caught in the destination server’s queue! So, prior to uninstalling Exchange 2003 on the source server we will verify the queue on the destination server _first_.
We deleted those to e-mails.
With a little help from Susan:
Philip Elder
MPECS Inc.
Microsoft Small Business Specialists
Co-Author: SBS 2008 Blueprint Book
*Our original iMac was stolen (previous blog post). We now have a new MacBook Pro courtesy of Vlad Mazek, owner of OWN.
We have a number of SBS 2003 sites where we created a new domain administrator account with identical permissions to the built-in 500 account.
Microsoft Windows Small Business Server Setup
Setup has detected the following requirements have not been met: You must be logged on using the built-in administrator account.
The above error message came up when we were running the Add/Remove Programs process to uninstall Exchange 2003 on the source server.
So, we enabled the built-in 500 domain admin account, reset the password, logged off, logged on, and re-ran the Add/Remove process.
We were then able to move on with removing Exchange 2003.
NOTE: It is important to have the Exchange 2003 install directory (exchsrvr65) or CD 2 from the SBS 2003 setup disks handy!
Philip Elder
MPECS Inc.
Microsoft Small Business Specialists
Co-Author: SBS 2008 Blueprint Book
*Our original iMac was stolen (previous blog post). We now have a new MacBook Pro courtesy of Vlad Mazek, owner of OWN.
We have updated our SBS 2003 to SBS 2011 Migration Guide:
We changed some minor items like wording and the order of a couple of steps within a step to help make things run a little smoother.
We also added a link to Microsoft’s new SBS 2011 Standard Migrations – Keys to Success post found on the Official SBS Blog.
The migration we ran over this weekend went quite well other than we had some issues pulling an Announcement List from the SBS 2003 v2 Companyweb site. Since the v2 Companyweb site was so small we were able to use Outlook to copy the multiple calendars that were being used with no issue but hit a snag on the Modified Date for the announcements.
The site was so small that it did not justify the time to run a full site migration into SharePoint Foundation.
So, we have an export of the announcements themselves and will work with our client on Monday on where to cut them off when dropping them into the new Companyweb site.
Philip Elder
MPECS Inc.
Microsoft Small Business Specialists
Co-Author: SBS 2008 Blueprint Book
*Our original iMac was stolen (previous blog post). We now have a new MacBook Pro courtesy of Vlad Mazek, owner of OWN.
Our destination SBS 2011 has an SQL (S-Q-L) process that was taking up a whopping 5GB of RAM:
Since this was a relatively fresh install of SBS 2011 we needed to find out what SQL setup was using so much memory.


Our WSUS SQL memory usage was now a lot more reasonable:
UPDATE 2011-07-16: Tweaked the steps for a typo as per Arcon’s comment.
Philip Elder
MPECS Inc.
Microsoft Small Business Specialists
Co-Author: SBS 2008 Blueprint Book
*Our original iMac was stolen (previous blog post). We now have a new MacBook Pro courtesy of Vlad Mazek, owner of OWN.
We had a need to back up a VM using network located storage during the migration we were running this weekend.
So, we downloaded StarWind iSCSI Target software that is free since the host was to be the source SBS 2003 box:
It turned out that we needed to download and install the Microsoft iSCSI Software Initiator first:
Once the StarWind software was installed we were able to open the StarWind Console and connect to the StarWind iSCSI service:
For a backup destination we needed to do the following:
On the Hyper-V box we needed to enable the Microsoft iSCSI Initiator service.
Once done we were able to select the iSCSI target located on our source SBS 2003 box.
The target showed up as a new disk in Disk Management. We initialized it and then set it to Offline status. We then finally connect the storage to our VM using the Hyper-V SCSI bus.
We now had a temporary local backup destination to use after each migration step on the SBS 2011 VM.
Philip Elder
MPECS Inc.
Microsoft Small Business Specialists
Co-Author: SBS 2008 Blueprint Book
*Our original iMac was stolen (previous blog post). We now have a new MacBook Pro courtesy of Vlad Mazek, owner of OWN.
We have not made any attempts to upgrade any of our existing Hyper-V Server 2008 R2 RTM failover clusters with Windows Server 2008 R2 SP1 yet.
Here are some resources that outline some of the good, bad, and ugly:
With the above in mind we will run the Service Pack on one node at a time making sure to have a good backup of each VM prior to beginning the process.
Philip Elder
MPECS Inc.
Microsoft Small Business Specialists
Co-Author: SBS 2008 Blueprint Book
*Our original iMac was stolen (previous blog post). We now have a new MacBook Pro courtesy of Vlad Mazek, owner of OWN.
The Microsoft Office Blog post:
The post has a nice grid with links to all of the various Office 2010 SP1 downloads:
Some helpful links:
Note that the Office 2010 SP1 download weighs in at 361MB.
Once we have the download we will extract its contents:


We then place the extracted files into the Updates folder of our Office 2010 Group Policy based distribution points. Any new installation would be up to date.
Note that we will not be distributing the service pack files to clients as of yet. We will test the service pack prior to releasing it for general use.
Philip Elder
MPECS Inc.
Microsoft Small Business Specialists
Co-Author: SBS 2008 Blueprint Book
*Our original iMac was stolen (previous blog post). We now have a new MacBook Pro courtesy of Vlad Mazek, owner of OWN.


